Axure RP is a powerful tool widely used in the UX design community for wireframing, prototyping, and creating interactive designs. Whether you’re designing user flows or creating high-fidelity prototypes, Axure offers a range of features that cater to beginner and advanced designers alike.
This blog will guide you through the essentials of Axure for UX design, highlighting its benefits, features, and practical applications.
What is Axure?
Axure RP is a robust design tool that allows UX professionals to create interactive prototypes and wireframes. Unlike tools that focus solely on visual aesthetics, Axure emphasizes functionality, making it ideal for testing user interactions and behaviors. Axure supports dynamic content, conditional logic, and advanced animations, enabling designers to build realistic prototypes without coding.
With its versatility, Axure is commonly used for UX design projects that require detailed user flows, interactive elements, and collaborative feedback loops.
Why Use Axure for UX Design?
1. Dynamic Prototyping
Axure allows designers to create prototypes with interactive elements such as dropdown menus, sliders, and hover states. These features help mimic real-world user interactions.
2. Conditional Logic
The tool supports conditional logic, enabling users to set up "if-then" scenarios. For instance, you can design a prototype where specific actions trigger unique responses, such as showing a success message after form submission.
3. Code-Free Animations
Axure offers animation options like transitions, fades, and movements—all without the need for coding. This simplifies the design process for non-technical designers.
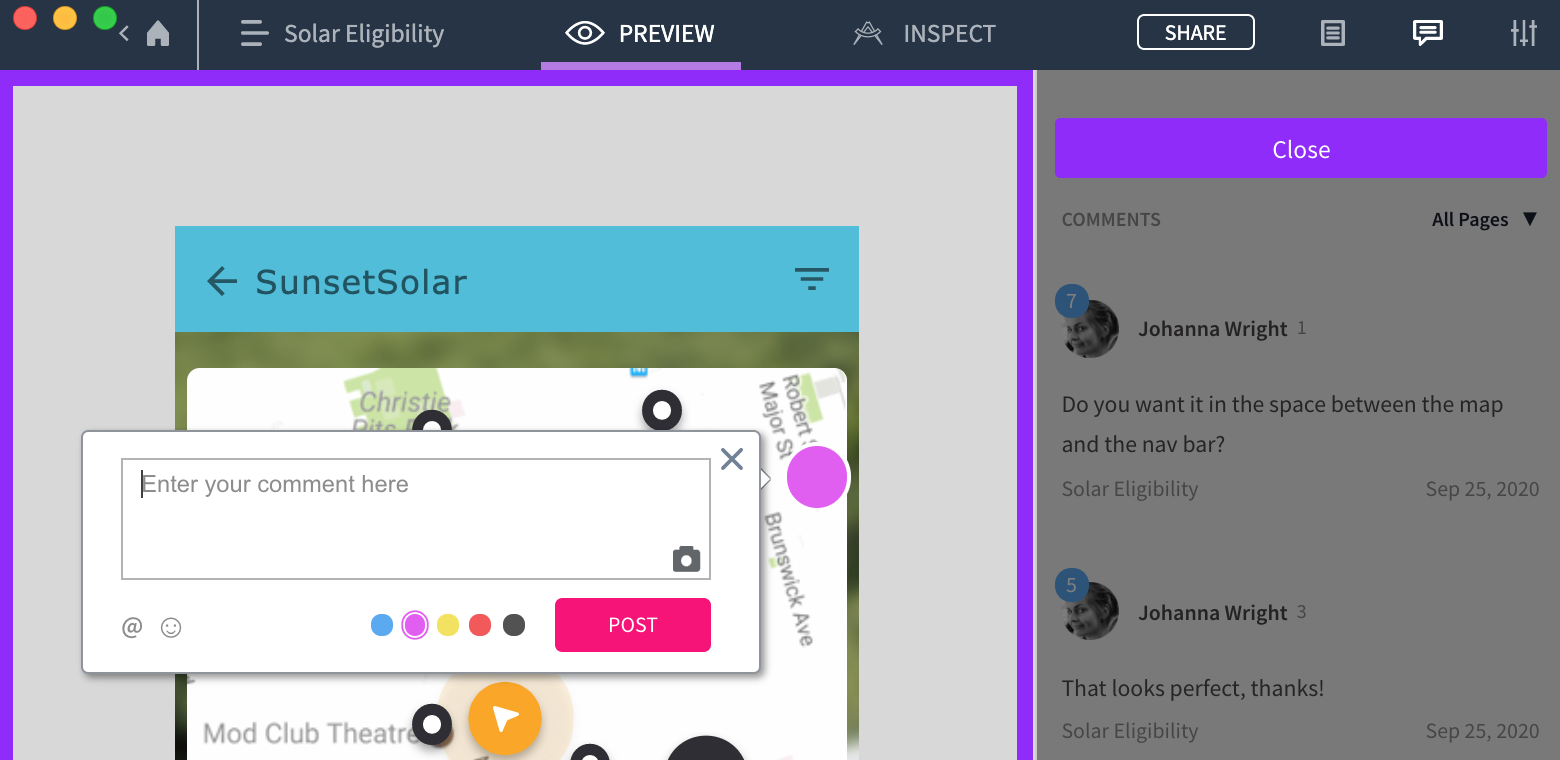
4. Collaboration and Feedback
Axure facilitates collaboration through shared workspaces, allowing teams to co-edit files, leave comments, and review iterations in real time.
5. Comprehensive Documentation
With Axure, you can generate detailed specifications for developers, including dimensions, colors, and interactions. This feature bridges the gap between design and development teams.
How to Get Started with Axure
Step 1: Install Axure RP
Visit Axure's website to download and install the latest version of Axure RP. Free trials are available for new users to explore its capabilities.
Step 2: Familiarize Yourself with the Interface
The Axure interface consists of several key components:
- Canvas: The main area where you design prototypes.
- Widgets: Prebuilt elements like buttons, forms, and text boxes.
- Inspector Panel: A section to customize widget properties and add interactions.
- Outline Panel: A visual hierarchy of your project elements.
Step 3: Start Wireframing
- Drag and drop widgets from the Library Panel to the canvas.
- Arrange these elements to outline your app or website layout.
- Use the Inspector Panel to adjust properties like size, color, and alignment.
Step 4: Add Interactions
- Select a widget and click on Add Interaction.
- Choose an event trigger (e.g., click, hover) and define the action (e.g., navigate to another page).
- Test your interactions by previewing the project.
Step 5: Share and Collaborate
Publish your prototype on Axure Cloud to share it with stakeholders. The cloud platform allows for feedback and version control, streamlining collaboration.
_1737051997599.png)
Key Features of Axure for UX Design
1. Adaptive Views
Design responsive prototypes that adapt to various screen sizes. Axure’s adaptive views feature lets you customize layouts for devices like smartphones, tablets, and desktops.
2. Reusable Components
Axure supports the creation of reusable widgets, such as buttons or menus. These components ensure consistency across your designs and save time on repetitive tasks.
3. Dynamic Panels
Dynamic panels enable designers to create complex, multi-state components, such as carousels or tabbed navigation.
4. Team Projects
Axure’s team projects feature allows multiple designers to work on the same file simultaneously. Changes are synced in real time, minimizing conflicts.
5. Export Options
Export your designs in various formats, including HTML, PDF, and PNG. The HTML export is particularly useful for sharing interactive prototypes.
Best Practices for Using Axure
1. Start with Low-Fidelity Wireframes
Focus on the structure and functionality of your design before adding visual details. Low-fidelity wireframes help keep the design process efficient.
2. Use Global Styles
Axure allows you to define global styles for text, colors, and shapes. This ensures consistency across your project and simplifies updates.
3. Test Your Prototypes
Use Axure’s preview mode to test prototypes regularly. Early testing helps identify usability issues before the final stages of design.
4. Keep the Design Modular
Break down complex designs into smaller, manageable components. Modular designs are easier to edit and scale.
5. Document Interactions Clearly
When sharing prototypes with developers, provide clear documentation of interactions and animations. Axure’s built-in annotation tools can simplify this process.
Why Axure Stands Out
While tools like Figma and Adobe XD focus heavily on collaborative design and aesthetics, Axure excels in creating functional prototypes. Its advanced features, such as conditional logic and dynamic panels, make it a preferred choice for projects requiring intricate user interactions. Axure’s ability to bridge the gap between design and development further strengthens its position as a leading UX design tool.
Conclusion
Axure RP is a comprehensive tool for UX designers who want to create dynamic, interactive prototypes without coding. Its extensive feature set and focus on functionality make it an indispensable tool for crafting user-centric designs. Whether you’re designing an app, website, or enterprise software, Axure provides the flexibility and power needed to bring your ideas to life.
By mastering Axure, you can elevate your UX design process, enhance collaboration, and deliver prototypes that resonate with users and stakeholders alike.
Master the art of crafting intuitive interfaces and unforgettable user experiences with our Advanced UI/UX Design Course. Gain hands-on skills, elevate your career, and create designs that leave a lasting impact.
Enroll now at Kaarwan and take your expertise to the next level!
FAQs
1. Is Axure suitable for beginners?
Yes, Axure’s intuitive interface and comprehensive tutorials make it beginner-friendly. However, its advanced features also cater to experienced designers.
2. Can I collaborate with others in Axure?
Yes, Axure supports team projects, allowing multiple designers to work on the same file simultaneously.
3. Does Axure require coding skills?
No, Axure allows you to create interactive prototypes without writing code. However, knowledge of coding can enhance your ability to customize designs further.
4. Is Axure better than Figma?
Axure and Figma serve different purposes. Axure excels in functional prototyping, while Figma is better suited for collaborative design and visual aesthetics.
5. Can Axure prototypes be shared online?
Yes, Axure Cloud allows you to publish and share your prototypes online, enabling real-time feedback and collaboration.