Creating professional, high-quality interior renders and exterior renders has become easier than ever with Lumion, a leading 3D visualization software. This guide will help you get started, offering tips, insights, and techniques to create visually captivating renders that impress.
What Is Lumion, and Why Use It for Interior and Exterior Renders?
Lumion is a 3D rendering software known for its ease of use, speed, and realistic render outputs. Designed to make architectural visualization accessible, Lumion is preferred by many 3D visualization beginners and seasoned architects alike for its ability to create both interior and exterior renders.
Its intuitive interface, library of materials, and vast model assets have transformed it into an essential tool for rendering, making it perfect for those without advanced modeling skills. But why Lumion? Here’s a look:
- User-Friendly Interface: Lumion’s drag-and-drop environment allows users to quickly design and adjust renders without a steep learning curve.
- Quick Rendering Speed: Known for rapid rendering, Lumion saves you time while still delivering high-quality images.
- Realistic Lighting and Effects: With features like sunlight, shadows, reflections, and weather adjustments, renders feel lifelike.
Key Features of Lumion for Beginners
Lumion offers diverse tools for realistic rendering, some essential for beginners include:
- Material Library: Pre-loaded materials make it easy to apply textures and finishes.
- Lighting Options: Adjust the lighting to add depth and realism.
- Effects: Create mood-based effects, such as rain or night scenes, to enhance visualization.
- Real-World Context: By adding trees, people, and buildings, renders feel authentic.
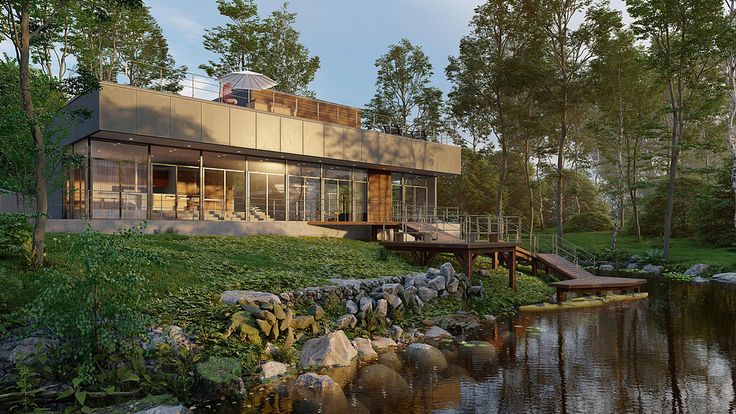
3D exterior render in Lumion_©archdaily.com
Steps for Creating Stunning Interior Renders with Lumion
Creating interior renders in Lumion can bring life to indoor spaces, adding warmth and detail. Here’s a step-by-step guide to start creating your own engaging renders.
1. Import Your 3D Model
Start by importing a model from popular software like SketchUp, Revit, or AutoCAD. Lumion supports a range of file formats, making it compatible with most architectural software.
- Tip: Ensure your model is organized before importing. A clean model reduces editing time in Lumion.
2. Set Up Lighting for Realism
Lighting is crucial for interior renders, as it affects ambiance and mood. Lumion offers several options, from natural sunlight to indoor lighting. Adjust brightness, direction, and shadows to achieve desired lighting effects.
- Example: For a cozy living room scene, dim the lights and add warm, yellow tones to create an inviting ambiance.
3. Add Furniture and Decorations
Lumion’s vast asset library includes furniture, plants, and accessories, perfect for 3D visualizers looking to enhance their renders. Adding these details can help viewers imagine the functionality of the space.
- Pro Tip: Group similar items to save time, especially for repetitive elements like chairs or wall decor.
4. Use Camera Angles and Perspectives
The right camera angle can change how viewers perceive a space. Experiment with angles to showcase key design elements, such as artwork or lighting features.
- Suggested Angles: For interiors, a slightly lower angle gives depth and height, making rooms appear more spacious.
5. Fine-Tune Details and Render
Fine-tuning is essential to enhance textures, reflections, and other small details. Take time to adjust settings before finalizing your render to avoid missing any critical elements.
Mastering Exterior Renders with Lumion
Exterior renders present different challenges than interiors, often requiring careful adjustments to lighting, materials, and environmental settings. Here’s how to create an impactful exterior render with Lumion.
1. Set Up the Environment
Lumion allows users to add elements like skies, clouds, trees, and even weather effects, making outdoor scenes realistic. Start by setting the time of day and weather conditions to create a specific ambiance.
- Example: For an evening render, add subtle lighting around the building and dim the environment for a twilight effect.
2. Select Materials for Exterior Surfaces
Materials greatly impact the quality of an exterior render. Lumion’s material library includes textures for wood, metal, glass, and more. Carefully choose materials that reflect the intended architectural style.
- Pro Tip: Adjust reflectivity and texture mapping to match real-life materials, which adds realism to the render.
3. Add Surrounding Landscape Elements
To create an immersive scene, add trees, pathways, or neighboring buildings. By creating a realistic environment, you enhance the render’s overall appeal and believability.
- Best Practices: Use Lumion’s landscaping tools to arrange trees and bushes naturally, rather than in straight lines.
4. Position the Camera for the Best Shot
Camera positioning is vital in exterior renders. Wide-angle views capture the entire building, while closer shots highlight architectural details. Experiment to find the best perspective that showcases your design.
5. Apply Effects and Render
Finally, apply effects like shadows, reflection, and color correction. Lumion’s “Real Skies” feature can also enhance outdoor visuals by adding photorealistic sky backgrounds.
The Benefits of Learning Lumion as a 3D Visualizer
Incorporating Lumion into your 3D visualization course or skill set offers distinct advantages for a 3D visualizer. Beyond technical skills, it allows you to express creativity by visualizing designs realistically.
Why Choose Lumion for Your Visualization Career?
- High Demand for Realistic Renders: With architectural visualization growing in demand, mastering Lumion can significantly enhance your career as a 3D visualizer.
- Reduced Rendering Time: Professionals who use Lumion often complete projects faster, allowing them to handle multiple projects.
- Collaborative Potential: Lumion integrates well with other software, enabling seamless workflows and easier collaboration.
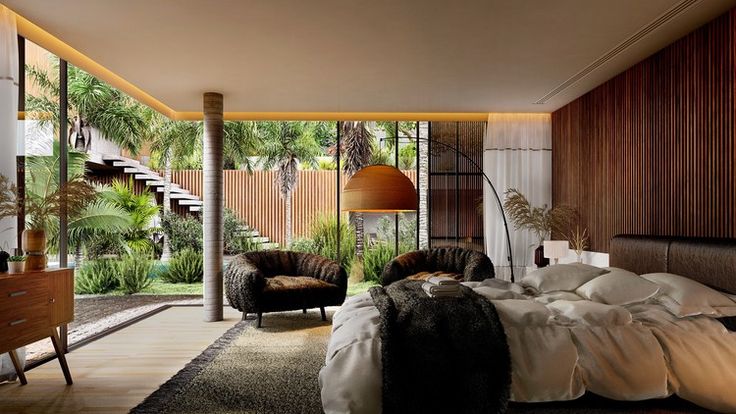
3D interior render in Lumion_©archdaily.com
Essential Tips for Maximizing Lumion's Potential
Whether you're a beginner or looking to refine your skills, consider these additional tips:
- Stay Updated on Software: Lumion regularly updates its features. Keeping software current helps you leverage the latest tools for better renders.
- Invest in Training: Consider a 3D visualization course to master advanced techniques and improve overall quality.
- Practice Lighting Techniques: Lighting can make or break a render. Dedicate time to perfect lighting setups.
- Optimize Hardware: Lumion performs best on powerful machines with good GPU support. Invest in a reliable setup to avoid rendering delays.
Conclusion
Mastering Lumion is a valuable skill for architects, designers, and visualization artists alike. By following these guidelines and exploring Lumion’s features, you’ll quickly elevate your renders from basic to professional-quality. Consistent practice, paired with an understanding of lighting, materials, and camera angles, will set you on the path to success in the field of 3D visualization.
Ready to master Lumion? Enroll in our Visualisation & Rendering Course and create breathtaking renders. Start today and bring your ideas to life!
Visit the Kaarwan website for more insights!
FAQs
Q1: What is Lumion, and why is it popular for interior and exterior rendering?
A1: Lumion is a powerful 3D rendering software designed for ease of use and realistic visualization. Its intuitive interface and extensive asset library make it ideal for both beginners and professionals looking to create high-quality interior and exterior renders.
Q2: How does Lumion help create realistic interior lighting in renders?
A2: Lumion provides adjustable lighting options, including natural sunlight and artificial indoor lighting, allowing users to set ambiance and depth. Users can modify brightness, shadow direction, and color tones to achieve a desired mood and add realism to interior spaces.
Q3: What are essential steps for creating professional interior renders in Lumion?
A3: Key steps include importing a clean 3D model, setting up lighting, adding furniture and decorations, selecting camera angles, and refining textures and details. This workflow ensures realistic, visually appealing renders that highlight the interior design.
Q4: What techniques enhance exterior renders in Lumion?
A4: To create engaging exterior renders, set the environment with appropriate skies, weather, and time of day. Use Lumion’s material library for realistic textures and add surrounding landscape elements, such as trees and pathways, to bring out the design’s authenticity.
Q5: Why should 3D visualizers learn Lumion for their careers?
A5: Learning Lumion offers numerous career benefits, including high demand for realistic 3D renders, faster project completion times, and seamless integration with other design software, all of which enhance a 3D visualizer’s skill set and job opportunities.