Though the procedure seems daunting, have you ever wished to bring your digital drawings to life with 3D printing? Grasshopper can be revolutionary if you study architecture either professionally or at school. Parametric design made possible by this strong visual programming tool inside Rhinoceros 3D makes difficult forms simpler to build and change. I will lead you through the foundations of 3D printing with Grasshopper in this guide, so clarifying the workflow, best practices, and how to maximise your designs for printing.
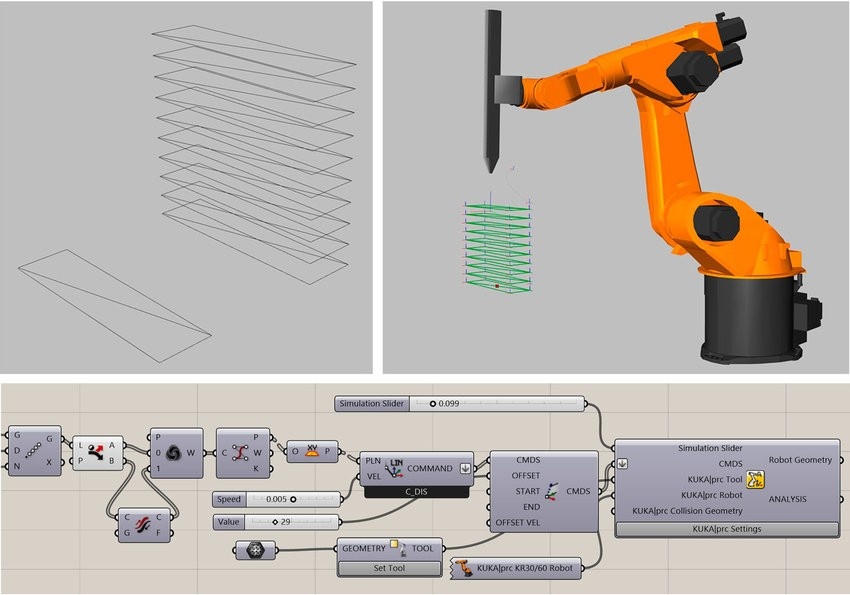
Image Credit: ResearchGate
Why Would One Use Grasshopper for 3D Printing?
Using logic-based commands instead of hand modelling, Grasshopper is a node-based algorithmic modelling tool allowing users to construct intricate designs. For generative design, shape exploration, and production processes—including 3D printing—this method makes perfect sense.
Also Read: A Guide to Parametric Modeling with Rhino
Important Advantages of Grasshopper Use for 3D Printing Include
- Parametric Modelling lets you rapidly alter designs by adjusting input values.
- Efficiency automates time-saving repeating modelling chores.
- Accuracy guarantees geometries fit 3D printing limitations.
- Seamless Rhino Integration works natively with the widely known tool in architectural and computational design, Rhinoceros 3D.
Getting Grasshopper Ready for 3D Printing
1. Software Requirements
- Rhinoceros 3D (Version 6 or later advised)
- Grasshopper (Pre-installed in Rhino 6 and 7)
- A Slicing Software (such as native slicing tools for Rhino, Cura, PrusaSlicer)
- Optional but advised for evaluating your outputs: 3D printer
Also Read: Understanding Computational Parametric Modelling
2. Comprehending the Process
- Create a basic geometry starting with a straightforward form in Rhino or Grasshopper.
- Apply parametric transformations and geometric manipulation with Grasshopper components.
- Look for printability; examine orientation, mesh quality, and thickness.
- Export in STL or OBJ to translate geometry into a format fit for slicing tools.
- Generate G-code using slicing tools then forward the file to a 3D printer.
Also Read: How Rhino Transforms Parametric Design in the AEC Industry
3D Printing Design for Grasshopper
1. Geometry Optimising
Not every brilliant design seen on-screen will print correctly. In order to guarantee a printable model:
- Maintain Minimum Wall Thickness – Varied 3D printing materials have varied needs, hence keep minimum wall thickness. Generally speaking, a safe minimum is 1.5–2mm.
- Reduce Overhangs – Steer clear of overhangs over 45° to cut the requirement for supports, therefore producing cleaner prints.
- Ensure Watertight Geometry – No gaps should allow slicing mistakes in the model.
2. Transposing to a 3D Printing Mesh
Most 3D printers call for mesh-based files such as STL or OBJ. Grasshopper enables direct mesh conversion and control by means of:
- Mesh Components – Mesh Brep and Mesh Surface
- Improving Mesh Density – Weld, Reduce Mesh for Maximum Performance
- Verifying Mesh Quality – Use mesh analysis to find mistakes prior to export
Also Read: How to Use Rhino Architecture for Complex Parametric Design Projects
3. Creating Grasshopper Support Structures
While slicers can create supports, Grasshopper's bespoke support structures give additional control:
- Minimal Material Utilisation – Achieved with point-based lattice architectures.
- Balanced Print Efficiency with Strength – Build slow density supports where needed.
- Lightweight but Sturdy Supports – Experiment with gyroid or Voronoi patterns.
Also Read: Key Skills for Computational Design Architects in the AEC Industry
Export and Slice Your Model
Export your completed model to a slicing program such as PrusaSlicer or Ultimaker Cura. Verify:
- File Format is STL or OBJ.
- Mesh is Closed and guarantees errors free.
- The selected 3D printer uses scaling correctly.
- Slicing settings like layer height, infill density, and print speed are adjusted based on the intricacy of your Grasshopper-generated mode
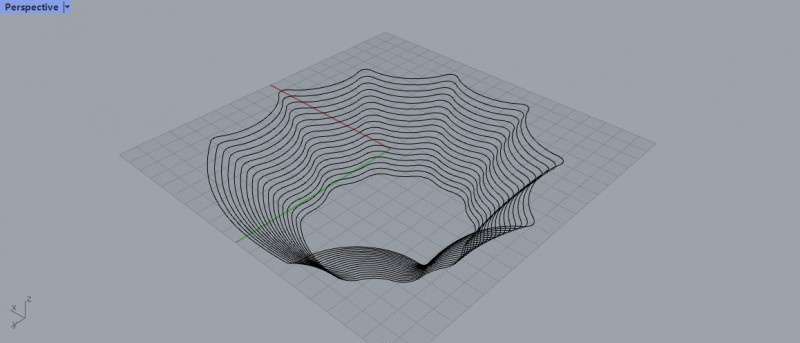
Image Credit: Easao
Grasshopper's Real-World Architectural 3D Printing Applications
1. Rapid Prototyping
By developing scale models with minute features, architects may enable fast design reviews and presentations.
Also read: Key Skills for Computational Design Architects in the AEC Industry
2. Customised Panels and Facades
Grasshopper's parametric tools allow for custom facades with perforations, patterns, and textures ideal for light and ventilation management.
3. Structural Optimisation
Architects can produce lightweight, structurally efficient 3D-printed components by using form-finding techniques including topology optimisation.
4. Product and Interior Design
Grasshopper lets designers create modular installations, furniture, and lighting fixtures with organic and computational aesthetics.
Final Thought
For architects, 3D printing using Grasshopper provides a universe of options including design customisation, efficiency, and innovation free from constraints. If you're just starting, concentrate on grasping parametric design ideas, testing several geometries, and improving your workflow.
Would you like to enhance your abilities? Discover our advanced Grasshopper Course to learn challenging generative design methods.
Visit our website Kaarwan for more!
FAQs
1. For novices, is Grasshopper challenging to learn?
Particularly with visual programming, Grasshopper is beginner-friendly. Anyone can understand its logic-based design philosophy with effort.
2. From Grasshopper, what file format should I use for 3D printing?
Most often used file formats for exporting 3D-printable models are STL and OBJ.
3. Is Grasshopper suitable for architectural large-scale 3D printing?
Definitely! Large-scale 3D printing projects including structural components and custom facades rely on Grasshopper extensively by many architects.
4. How might I make sure my design is 3D-printable?
Before exporting your file, review wall thickness, overhang angles, and watertight geometry.
5. Where may I find additional Grasshopper and 3D printing knowledge?
Enrol in our Grasshopper training classes to acquire advanced knowledge and practical experience.