Interior Tiling Details in Architecture
Interior tiling plays a crucial role in both the performance and aesthetics of a space. Beyond surface-level appearance, good tiling work depends on substrate preparation, material choice, waterproofing systems, expansion joints, and installation accuracy. In architecture, vitrified and porcelain tiles remain the preferred choice for most indoor applications due to their strength, low porosity, and consistent finishes. However, the detailing required for dry areas like living rooms or bedrooms differs significantly from wet areas such as bathrooms and utilities, where moisture protection, wall tiling, and slope management become critical. Understanding these processes helps designers specify the right layers, contractors achieve durable finishes, and homeowners get long-lasting, low-maintenance interiors.
Dry-Area Tiling
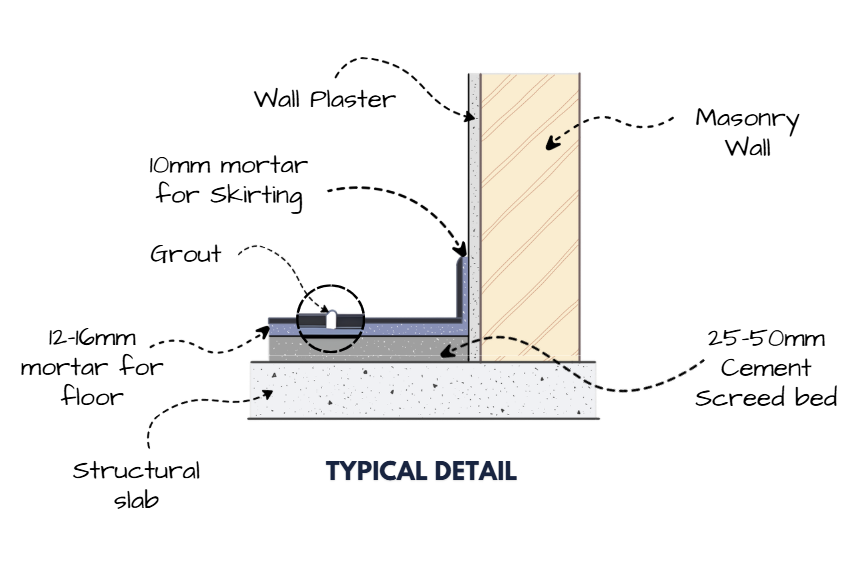
Dry-area tiling primarily involves vitrified or porcelain tiles installed on a prepared floor bed, ensuring proper leveling, bonding strength, and impact resistance. The process begins with creating an even, compacted substrate—typically a cement-sand screed of adequate thickness—cured sufficiently to avoid shrinkage cracks. Before tile installation, the substrate is cleaned, dust-free, and lightly moistened to prevent dry suction from weakening adhesive strength. Modern practice favors polymer-modified tile adhesives rather than traditional thick cement mortar, as they provide better bonding, flexibility, and reduced hollow-sound issues. Tiles are laid using the “back-buttering + trowel comb” method to ensure 100% contact, minimizing air pockets that can cause later cracking or drumming.
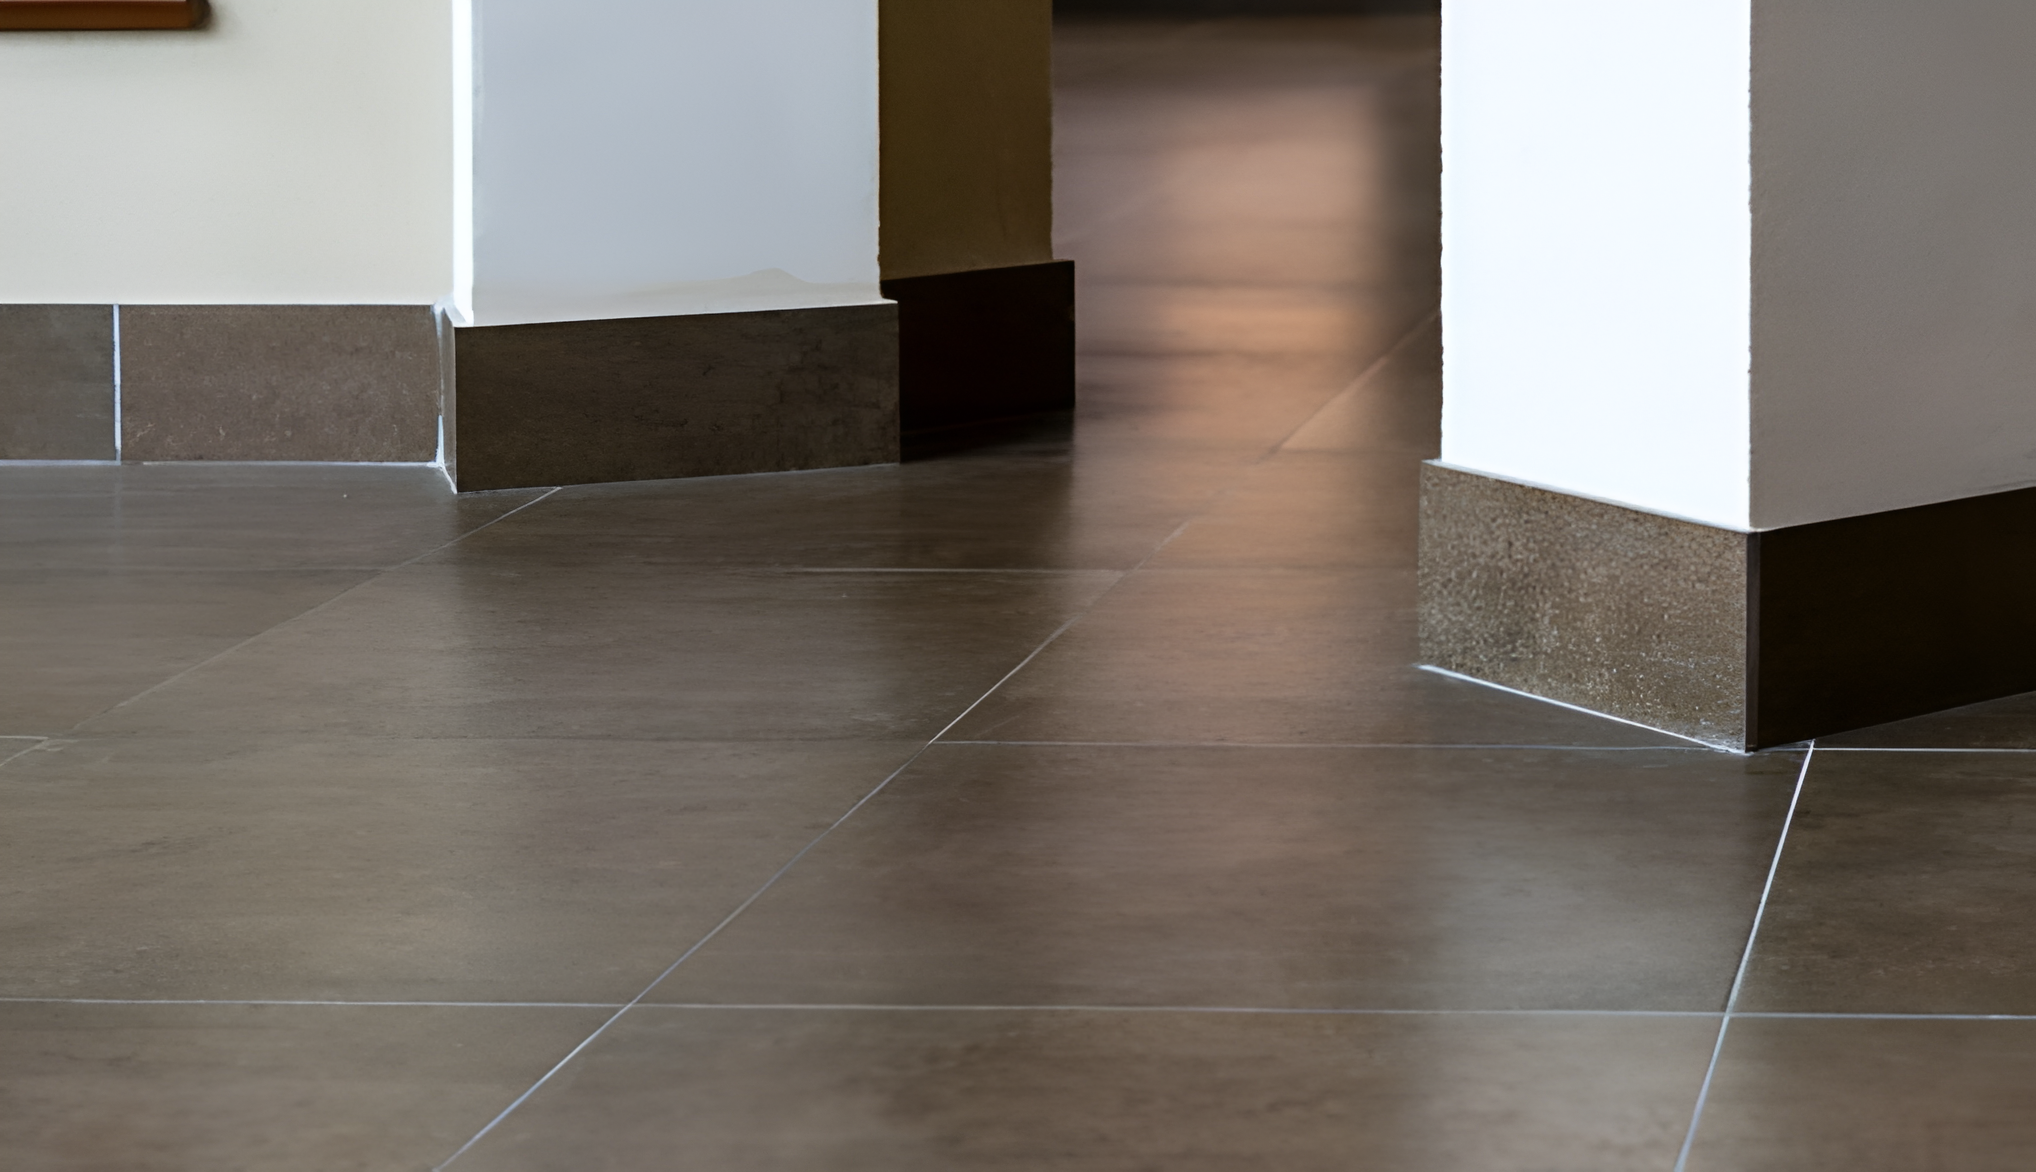
Image Credits: Housing.com
Spacing and joints play a crucial role even in dry areas, with tile spacers ensuring uniform grout lines, and expansion joints provided at room edges or every 8–10 meters in larger spaces to accommodate movement from thermal or structural changes. After laying, tiles are tapped gently with a rubber mallet to eliminate voids, ensuring alignment with a laser or string. Grouting is done only after the adhesive cures, typically using cementitious or epoxy grout depending on the expected level of foot traffic and cleaning frequency. Finishing includes cleaning off residue, sealing joints if required, and ensuring threshold details (such as between rooms or at doorways) are leveled or transitioned neatly. Good dry-area tiling depends not only on perfect alignment and lippage-free surfaces but also on precise cutting around door frames, wardrobe areas, floor outlets, and kitchen entrances so that the final look appears seamless and architecturally deliberate.
Wet-Area Tiling
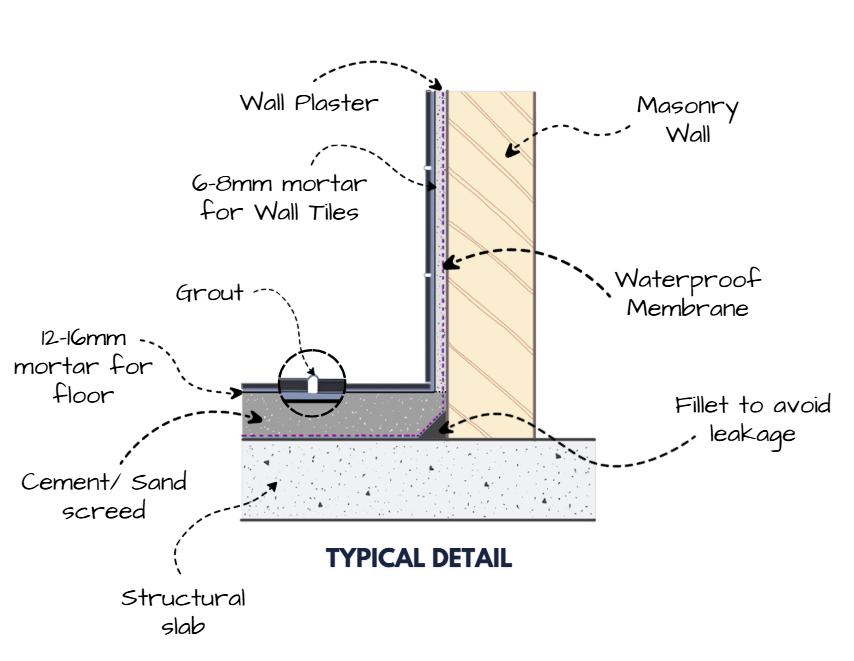
Wet-area tiling demands far more critical detailing because the surface must withstand constant moisture, water splashes, and cleaning chemicals while also preventing seepage into adjacent rooms. The process begins with waterproofing, which is the most important step and often the cause of long-term failures when done poorly. The substrate is prepared with a slope (usually 1:100 to 1:80) directing water toward floor drains. A polymer-modified waterproof coating is applied on the floor, over the coving (the junction where floor meets wall), and up all walls to a required height—often full wall height for showers and a minimum of 1 meter elsewhere. Corners, pipe penetrations, and drain surroundings receive tape or mesh reinforcement to prevent cracks from transferring through the waterproof layer.
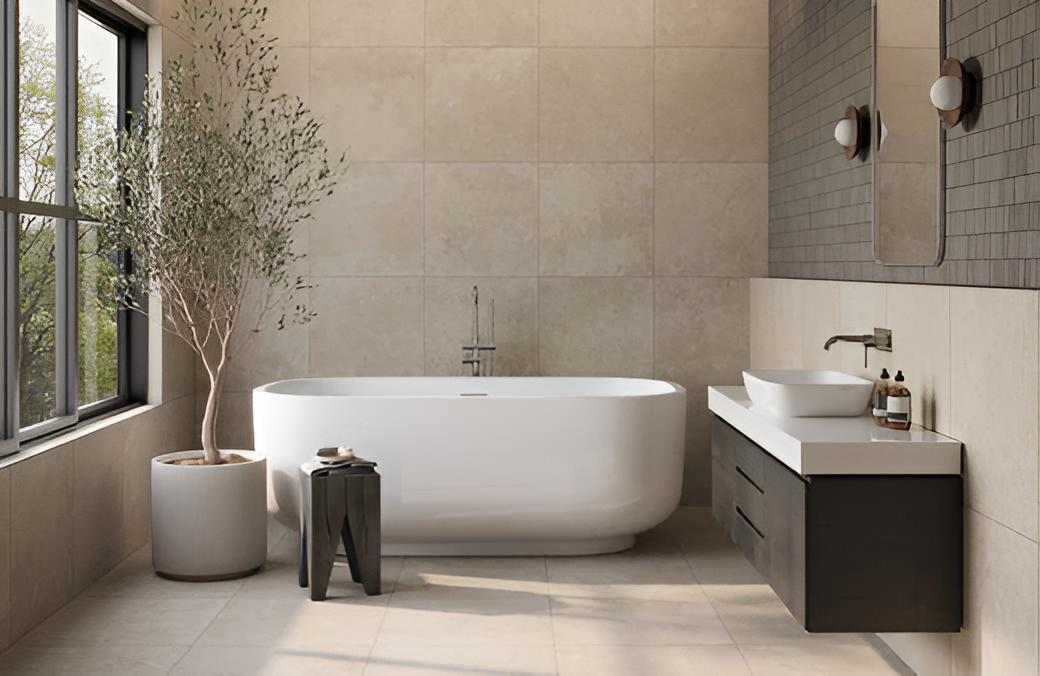
Image Credits: Edwardmartin.com
Once the waterproofing cures, tiling begins using high-bond adhesives suitable for wet environments. Floor tiles generally use matte, slip-resistant porcelain tiles, while wall tiles can be ceramic or porcelain depending on design preference. Both must be installed with full adhesive coverage, often requiring back-buttering. Floor tiles must follow the pre-designed slope without creating uneven planes or puddle points. On walls, tile alignment begins from a carefully marked datum line to maintain consistent grout lines across all sides, regardless of the bathroom’s uneven geometry. Cutouts for plumbing fixtures—faucet points, concealed flush plates, floor traps, and shower lines—require exact measurement to avoid chipping or uneven edges.
Grouting in wet areas typically uses waterproof cementitious or epoxy grout to minimize water penetration. Silicone sealant (not grout) is used for all wall–floor junctions and vertical corners, since these are movement joints that need flexibility. After installation, the entire bathroom must undergo a flood test, where the floor is filled with water for 24–48 hours to check for leaks before handing it over for final fixtures and accessories installation. The final finish must be easy to clean, well-sloped, free from lippage, and neatly detailed around drains, niches, countertops, and utility lines. Proper wet-area tiling ensures long-term durability, prevents seepage-related damage, and enhances the functional lifespan of the space.
Final Thoughts
Interior tiling is far more than placing tiles on a surface—it is a layered system that combines substrates, adhesives, waterproofing, alignment, joints, and finishing. Dry areas focus on flatness, aesthetics, and durability, while wet areas prioritize moisture defence, slope management, and sealing. When each step is executed with precision, vitrified and porcelain tile surfaces can last decades without deterioration, ensuring both functional resilience and architectural elegance. Whether designing a home, office, or commercial interior, well-executed tiling details significantly influence long-term performance and maintenance requirements.