.jpeg)
You have spent weeks learning Revit. Maybe months. You have done the tutorials, built your first model, figured out how families work, and survived your first clash detection session. And now there is an interview in three days, and you are not entirely sure what they are actually going to ask.
That is exactly where this guide comes in.
This is a complete list of Revit interview questions and answers for 2026 — covering everything from the basics you need to know as a fresher to the advanced workflow questions that come up at senior BIM roles. Whether you are applying to your first architecture firm, targeting an MEP company, or going for a BIM coordinator position, these questions reflect what is genuinely being asked in the Indian AEC market right now.
Kaarwan's BIM and Revit instructors have worked at and trained professionals for firms like AECOM, Dar Al-Handasah, and Jacobs — so this list reflects what those interviews actually look like from the inside.
Why Interviewers Test Revit Skills Differently in 2026
Something has shifted in the last two years. It used to be enough to say you know Revit. Now firms want evidence of how you use it.
Over 65% of AEC firms globally are using BIM workflows on active projects, and in India the adoption is accelerating — particularly at large commercial, infrastructure, and institutional project firms like L&T Construction, Shapoorji Pallonji, AECOM India, and Nikken Sekkei India. These firms are not hiring people who need six months of hand-holding. They are hiring people who can open a Revit file, understand the project structure, and start contributing within the first week.
What that means for your interview: expect questions that test judgment, not just software knowledge. Not just "what is worksharing" but "how have you handled a situation where two team members edited the same element?" The technical knowledge is table stakes. The application is what they are measuring.
A 40% salary premium is consistently documented for BIM-certified architects in India. That number is not accidental — it reflects the genuine shortage of people who can both design and deliver using BIM tools. Your interview is your chance to show you are on the right side of that gap.
Also Read : BIM Engineer Interview Questions.
Revit Interview Questions for Freshers (0–1 Year Experience)

1. What is Revit and how is it different from AutoCAD?
This one comes up in almost every interview. Every single one.
Autodesk Revit is a Building Information Modeling (BIM) software that creates intelligent 3D models — not just geometry, but models that carry information. Every wall knows its material, thickness, and fire rating. Every door knows its type, size, and hardware. Every room knows its area and occupancy. The model is a live database of the building.
AutoCAD is a drafting tool. It produces lines, arcs, and text. It does not know what those lines represent. A wall in AutoCAD is just two parallel lines — there is no structural logic, no material data, no automatic schedule generation.
The practical difference: in Revit, if you move a wall, every plan, section, elevation, and schedule that references that wall updates automatically. In AutoCAD, you update each view manually. For large projects with multiple disciplines and hundreds of drawing sheets, that difference is enormous in terms of coordination time and error rate.
Firms in India have largely moved to Revit for commercial and institutional projects. If you are applying to a BIM-focused role, this distinction needs to be clear in your answer.
2. What are the three types of Revit families?
Families are the building blocks of Revit — every element in your model belongs to a family. There are three types:
System Families — Built directly into Revit. You cannot load these from an external file or delete them. Walls, floors, ceilings, roofs, and stairs are all system families. You work with them by duplicating and modifying their types within the project.
Loadable Families (Component Families) — Created separately in the Family Editor and loaded into projects as needed. Doors, windows, furniture, equipment, light fixtures — all loadable families. These are the ones you create, download, or customise most frequently.
In-Place Families — Created directly inside a project for one-time use. A custom staircase feature that will never be repeated anywhere else, for example. Useful but not ideal for repeated elements because they cannot be reused across projects.
Interviewers sometimes follow this up with: "What are the limitations of In-Place families?" The honest answer is that they increase file size, cannot be shared across projects, and do not appear in schedules as cleanly as loadable families.
Also read: BIM interview questions for beginners
3. What is a workset in Revit?
A workset is a logical grouping of model elements that can be assigned to a specific team member for editing. When worksharing is enabled on a project, the model is divided into worksets, and each workset can only be actively edited by one person at a time.
Think of it like checking out a book from a library. While you have it, no one else can edit those elements. When you synchronise with the central model, your changes are shared and the elements become available to others.
Typical workset names on a real project: Shared Levels and Grids, Architecture — Shell, Architecture — Interior, Exterior Envelope, MEP Systems, Linked Models. The exact structure varies by firm and project complexity.
The key thing to communicate in an interview: worksets are not just a collaboration tool, they are also a performance tool. Closing worksets you are not working on reduces the amount of model data loaded into memory, which speeds up a heavy Revit file significantly.
4. What is the difference between a project parameter and a shared parameter?
A project parameter exists only in the project where it was created. It cannot be used across different families or in multiple projects without being recreated. Useful for project-specific data tracking.
A shared parameter is stored in an external text file and can be used across multiple families and projects. Because it has a unique GUID (a global identifier), Revit recognises it as the same parameter wherever it appears, which means you can schedule elements from different families in a single schedule using a shared parameter both families carry.
In practice: if you want to schedule doors and windows together in a single hardware schedule, and both families use a shared parameter called "Hardware Set," that schedule is possible. With project parameters, it is not.
5. What is the purpose of levels and grids in Revit?
Levels define the vertical organisation of your building, each floor, each storey, each datum that matters. Elements like floors, ceilings, and rooms are hosted to levels. If you move a level, everything associated with it moves too. This is why getting your levels correct early in a project is so important; correcting them later creates cascading issues.
Grids define the horizontal reference framework, the column grid that structural engineers, MEP consultants, and architects all work from. In a multi-discipline BIM environment, grids are usually set up once and then shared via linked model coordination, so every discipline is working to the same spatial reference.
Both levels and grids appear in elevation and section views. Setting them up correctly is one of the first things you do when starting a new Revit project.
6. What is a view template in Revit?
A view template is a saved set of display settings that can be applied to any view. Scale, detail level, visibility overrides, line weights, phase filters, all stored together and applied in one click.
Why this matters: on a real project with 50 floor plan views, 30 section views, and 20 elevation views, manually configuring each one is not practical. View templates let you configure once and apply everywhere, and they let project managers lock settings so individual team members do not accidentally change them.
When you apply a view template to a view, that view inherits all the template's properties. Any future changes to the template automatically propagate to all views using it. This is foundational to maintaining documentation consistency, which is something every firm cares about deeply.
7. How do you create a floor plan in Revit?
Floor plan views are created from levels. When you add a new level to a Revit project, a floor plan view is automatically generated for that level, this is the default behaviour.
You can also create additional plan views from any existing level: View tab → Plan Views → Floor Plan → select the level. This lets you have multiple plans of the same level with different visibility settings — one for architectural documentation, one for furniture layout, one for coordination.
The floor plan shows all elements within the view range — the cut plane, top, and bottom settings that determine what you see. Understanding view range is essential for floor plan work because incorrectly set view ranges are one of the most common reasons elements appear missing or are shown when they should not be.
8. What is the Project Browser?
The Project Browser is the panel on the left side of the Revit interface that shows the hierarchical structure of everything in your project — all views, sheets, families, groups, and links organised into a tree structure.
From the Project Browser you can: open any view by double-clicking, drag views onto sheets, rename views and sheets, duplicate views with or without detailing, delete unused content, and see the structure of the entire project at a glance.
In interviews, this question is testing whether you actually use Revit day-to-day. A confident, specific answer demonstrates you have spent real time in the software.
9. What is a legend view in Revit?
A legend view is a special type of view in Revit that can be placed on multiple sheets — unlike all other views, which can only appear on one sheet. This makes legends ideal for repetitive documentation items like line style legends, symbol keys, and material notation keys that need to appear on many drawing sheets.
Legends can display family types symbolically without creating actual instances of those families in the model. So you can show a door type in a legend without placing that door in the building.
10. How do you link a CAD file into Revit?
Insert tab → Link CAD → navigate to the file → configure import settings (units, colours, layers, and positioning) → click Open.
The difference between Link CAD and Import CAD: a linked CAD file maintains a relationship to the original file and can be reloaded if the original is updated. An imported CAD file is embedded permanently and breaks that connection. For files you might need to update, site surveys, consultant drawings — always use Link CAD.
Positioning matters significantly. For site plans and coordinated multi-discipline projects, Origin to Origin is usually the correct setting. For reference files where position does not matter, Center to Center is simpler.
Ready to answer Revit interview questions with confidence? Build real-world BIM skills through Kaarwan's Professional Revit & BIM Certification Course and gain the practical experience top architecture and engineering firms look for.
Intermediate Revit Interview Questions (1–3 Years Experience)
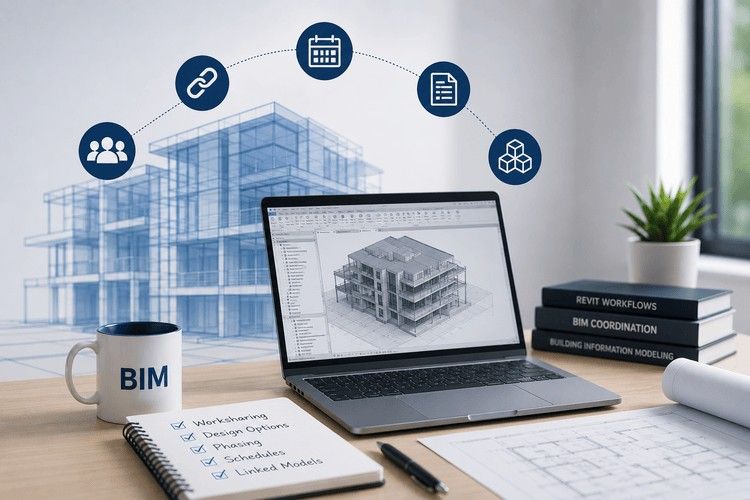
11. Explain the difference between System Families, Loadable Families, and In-Place Families
(See Q2 above for basics — at intermediate level, expand on behaviour and limitations)
The key intermediate-level nuance here is knowing when to use each type and why. System families cannot be transferred between projects using the normal family loading workflow — you use Transfer Project Standards to copy them. Loadable families are fully portable. In-Place families stay within the project they were created in.
At an interview for a 1–3 year role, you will likely be asked to explain which you would choose for a specific scenario: "You need a custom reception desk that will only appear once in this project. Which family type?" In-Place is the correct answer — and then the follow-up is usually "what is the limitation?" The limitation is it cannot be scheduled the same way as loadable families and cannot be reused.
12. What is worksharing and how does the central model work?
Worksharing is Revit's multi-user collaboration system. One project file is designated as the Central Model — stored on a shared network location or in Autodesk Construction Cloud. Each team member creates a Local Copy on their own machine and works from that. Changes are shared by synchronising with the Central Model.
The process: Open Central → Save As → Local Copy to your machine → work in your local copy → Synchronise with Central to push and receive changes.
The Central Model acts as the master record. It aggregates every team member's changes during synchronisation. If two people have edited different elements, both changes are merged. If two people have tried to edit the same element, the second person gets a conflict notification and must resolve it.
In real projects at firms like L&T or AECOM India, teams of 10–20 people work on a single workshared Revit model. Proper workset assignment, disciplined synchronisation habits, and clear communication protocols are what keep these models healthy.
13. How do you manage design options in Revit?
Design options allow you to develop multiple design alternatives within a single project file — without duplicating the entire model. You create Option Sets (the question being explored) and Options within each set (the different answers).
Example: You are exploring three facade options for a commercial building. You create a Design Option Set called "Facade Design" and three options within it: Option A (curtain wall), Option B (brick with punched openings), Option C (composite panel system). You model each option within its own option, and you can toggle between them in any view.
Only one option per set is designated as Primary, this is the default shown in views that have not been specifically set to show a particular option.
Design options are particularly useful for client presentations where you need to show alternatives and have not yet made a final decision.
14. What are phasing and phase filters used for?
Phasing allows you to assign every element in a Revit model to a specific construction phase — when it was created and (if applicable) when it was demolished. This is essential for renovation projects, phased construction projects, and existing conditions documentation.
Default phases in a new Revit project: Existing and New Construction. You can add custom phases for complex phased developments.
Phase Filters control how elements in different phase states appear in each view. The default filters are: Show All, Show Previous + Demo, Show New, Show Previous + New. These filters can be customised — for example, creating a view that shows existing elements in grey and new elements in colour is a common documentation requirement for renovation projects.
At an intermediate level, you should be able to explain not just what phasing does but describe a real application — "In a hospital renovation project I was involved with, we used phasing to manage the handover of clinical areas in stages, with construction in one zone while another remained operational."
15. How do you create and manage schedules in Revit?
View tab → Schedules → Schedule/Quantities → select category → configure fields, filters, sorting, and formatting → OK.
The fields you add to a schedule are the properties of the elements you are scheduling. For a door schedule: Mark, Type, Width, Height, Level, Fire Rating, Hardware Set. For a room schedule: Room Number, Room Name, Area, Level, Occupancy.
Schedules update automatically as the model changes, add a door, and it appears in the schedule immediately. This is one of the most powerful aspects of BIM-based documentation.
Managing schedules effectively means understanding: filtering (showing only doors on Level 2), grouping (grouping by level or type), sorting (alphabetically or by mark number), and calculated fields (area calculations, cost calculations using formulas).
16. What is a material takeoff and how is it different from a regular schedule?
A regular schedule lists elements — doors, windows, rooms. A material takeoff lists the materials that make up elements, extracted directly from the model's construction data.
For example, a wall schedule might list 45 walls. A material takeoff of the same walls would list the concrete, insulation, plasterboard, and paint quantities that make up those walls — volumes, areas, and weights depending on what you have defined.
Material takeoffs are powerful for early cost estimation and sustainability analysis. If your wall types have accurate layer thicknesses and densities, the material takeoff gives you actual concrete volumes and steel quantities directly from the model — not estimated from drawings.
In practice at Indian construction firms, material takeoffs from Revit are being used for preliminary estimates and BOQ generation, reducing the time spent on manual quantity surveying.
17. How do you set up a sheet in Revit for construction documentation?
View tab → Sheet → New Sheet → select title block → name and number the sheet.
Once the sheet is created, you drag views from the Project Browser onto the sheet. Each view placed on a sheet becomes a viewport. You can adjust viewport scale, crop the view, and position it precisely on the sheet.
A well-set-up sheet includes: the correct title block with project information filled in, viewports placed at consistent positions, view titles below each viewport, north arrow on plan sheets, scale annotation, revision cloud and revision schedule if applicable.
Sheet setup discipline is something that separates junior Revit users from those who have worked on real project documentation. The first time you have to re-do 30 sheets because the title block was wrong or the viewports were not aligned is the last time you take sheet setup casually.
18. What is the use of scope boxes in Revit?
A scope box is a 3D volume that controls the extents of datums (levels and grids) and the crop regions of views. You draw it in plan view, set its height, and then assign levels, grids, and views to it.
The main use: on large projects where different zones of the building need different sets of grids visible, scope boxes let you show only the relevant grids in each area's drawings. Instead of manually adjusting each view, you assign the view to a scope box and it clips the datum extents automatically.
Scope boxes also ensure crop region consistency across multiple views showing the same area — useful when you have multiple floor plans at the same area that all need to show exactly the same extent.
19. How do you use the Transfer Project Standards feature?
Manage tab → Transfer Project Standards → select source project → choose which standards to transfer → OK.
Transfer Project Standards copies: view templates, object styles, line styles, line patterns, fill patterns, text types, dimension styles, tag families, and more — from one project to another.
This is how firms propagate company standards across multiple projects. A master template project contains all the configured standards. When starting a new project, the team transfers standards from the template.
Be careful about duplicates — if both projects contain an element of the same name, Revit gives you options: overwrite the existing, keep the existing, or create a renamed copy. Overwriting without checking can accidentally reset custom settings in the target project.
20. What are keynotes and how are they used in documentation?
Keynotes are annotation tags that reference a numerical key — rather than writing the full specification note on a drawing, you place a keynote number that references a keynote legend or specification section.
Types of keynotes in Revit: Element Keynotes (from the material or element definition), User Keynotes (manually assigned), and Material Keynotes (from material properties).
For large commercial projects in India, keynotes are increasingly used to manage the coordination between architectural drawings and project specifications, the keynote number on the drawing corresponds to a specification clause number, reducing transcription errors and making coordination between design and documentation teams cleaner.
21. Explain the use of constraints and locking in Revit
Constraints are parametric relationships between elements that maintain dimensional or positional consistency when the model changes.
Example: constraining a door's centre to a wall's centre using an aligned dimension with a lock applied. When the wall moves, the door moves with it, maintaining its centred position.
Locking applies to aligned dimensions and positioning. When you click the padlock icon on a dimension, it creates a constraint. When you try to move a constrained element, Revit will move everything it is constrained to together — or warn you that you are about to break a constraint.
Overuse of constraints is a common Revit performance problem. If too many elements are heavily constrained, Revit must resolve a chain of relationships with every edit, slowing down the model and creating cascading warning messages.
22. How do you handle linked models (architectural, structural, MEP)?
Linked models allow separate discipline models to be combined for coordination without merging them into one file.
Setup: Insert tab → Link Revit → select the file → set positioning (Origin to Origin for coordinated models) → OK.
Managing links: Manage tab → Manage Links. From here you can reload updated versions of links, change their position, unload them temporarily for performance, or remove them.
Visibility of linked models is controlled through Visibility/Graphics Overrides. You can override the display of linked model elements independently — showing structural elements in a specific colour in your architectural views, for example.
The Copy/Monitor tool lets you track critical elements from a linked model — if the structural engineer moves a column you have placed a wall against, Revit alerts you to the change so you can update your model accordingly.
23. What is a revision cloud and how is it tracked in Revit?
A revision cloud is an annotation element that marks areas of a drawing where changes have been made since the last issue. The cloud shape visually draws the reviewer's attention to what has changed.
Revit manages revisions as a project-level list: Manage tab → Additional Settings → Sheet Issues/Revisions. You create revision entries with a sequence number, date, description, and issue type.
When you draw a revision cloud, you assign it to a specific revision from that list. The revision information automatically appears in the revision schedule on the title block, which typically shows all revisions that have clouds on that particular sheet.
Revision tracking in Revit is significantly better than in CAD-based workflows because the model enforces a consistent revision record across the entire document set.
24. How do you export a Revit model to IFC?
File → Export → IFC → configure IFC export settings → select IFC version → choose what to export → specify file location → OK.
IFC (Industry Foundation Classes) is an open, non-proprietary format for BIM data exchange. It allows Revit models to be opened and used in other BIM software — ArchiCAD, Tekla, Bentley, and various analysis tools — without requiring Revit.
IFC export settings are important: the IFC version, how elements are mapped to IFC classes, whether properties are included, and how spaces and zones are exported all affect the quality of the output. For facility management handovers and coordination with consultants using different software, getting IFC export right is a genuinely important skill.
25. What are the best practices for naming conventions in a Revit project?
Consistent naming conventions are foundational to a healthy Revit project, especially on workshared projects with multiple team members.
View naming: [Discipline]-[Level/Area]-[View Type]-[Detail Level] — e.g., "AR-L01-Floor Plan-Coordination" or "ST-B1-Foundation Plan."
Family naming: [Category]-[Manufacturer/Type]-[Size/Variant] — e.g., "Door-Timber Flush-900x2100."
Workset naming: by discipline and function — "AR-Shell," "AR-Interior," "ST-Structure," "ME-Mechanical," "EL-Electrical."
Sheet naming: typically defined by the BIM Execution Plan — e.g., "A100 — Ground Floor Plan," "S200 — Structural Notes."
In a real BIM Execution Plan for a project at L&T or AECOM India, naming conventions are documented and mandatory. Interviews at these firms often ask for a specific example of a naming convention you have used or why consistent naming matters.
Ready to answer Revit interview questions with confidence? Build real-world BIM skills through Kaarwan's Professional Revit & BIM Certification Course and gain the practical experience top architecture and engineering firms look for.
Advanced Revit Interview Questions (3+ Years / Senior Roles)
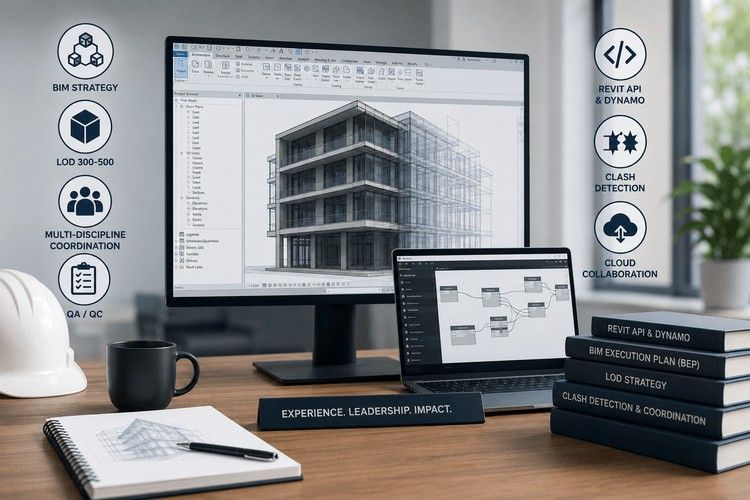
26. What is Dynamo and how have you used it in a real project?
Dynamo is a visual programming tool that extends Revit's capabilities through automation and parametric scripting. You build scripts using a node-based interface — each node performs an operation, and you connect them to build a workflow.
What Dynamo can do in practice:
Batch rename 200 views in a consistent format in under a minute. Manually, that same task takes hours and introduces inconsistencies.
Generate room data sheets automatically from room parameter information. Instead of manually creating individual room sheets, a Dynamo script creates them all at once with the correct views placed and labelled.
Place elements along complex curves — useful for facade panels, lighting layouts, or structural elements that follow non-standard geometry Revit's native tools cannot handle directly.
Extract data to Excel for reporting — pulling room areas, door quantities, or material volumes into spreadsheets for cost estimation or project management.
In senior interviews, saying "I have used Dynamo" is not enough. You need a specific example: what problem did you have, what did the script do, what was the outcome. The most convincing answers describe time saved or errors avoided.
27. How do you run a clash detection workflow using Navisworks and Revit?
The process in practice:
Export Revit models as NWC files from each discipline — architecture, structure, MEP — using the Navisworks Exporter. Keep all NWC files in a shared folder.
In Navisworks, append all discipline files into one coordination model using the same project origin.
Run Clash Detective: define test rules — for example, "test Architectural Walls against MEP Ductwork, hard clash, 0mm tolerance." Run the test.
Review clash results: Navisworks generates a list of all clashes with visual highlighting. Each clash gets a status (New, Active, Reviewed, Approved, Resolved).
Export clash reports as HTML or NWD for coordination meetings.
In coordination meetings, assign each clash to the responsible discipline for resolution. Update status as issues are resolved.
In the Indian context, firms running large commercial or infrastructure projects — hotel towers, corporate campuses, hospital buildings — use this workflow weekly. The value is catching HVAC duct routing conflicts before the MEP contractor is on site trying to install them.
28. What is the difference between BIM 360 and Revit Server for cloud collaboration?
Revit Server is an older, server-based collaborative system where a Central Model is hosted on a server accessible via local network or WAN. It was the standard before cloud solutions matured. Requires IT infrastructure setup and maintenance. Works well on stable, fast networks. Limited accessibility outside the office network.
Autodesk Construction Cloud (formerly BIM 360) is the cloud-based successor. Central Models are hosted in Autodesk's cloud infrastructure. Team members access through a standard internet connection from anywhere. Includes additional project management tools, issues, RFIs, submittals, document management.
The direction of the industry is clearly toward cloud-based collaboration. In 2026, most new projects at major Indian firms are starting on Construction Cloud rather than Revit Server. If you are interviewing at a firm that handles large commercial or mixed-use projects, being familiar with Construction Cloud workflows is increasingly expected.
29. How do you set up and manage a BIM Execution Plan (BEP)?
A BIM Execution Plan is the project document that defines how BIM will be used, managed, and delivered throughout a project. It is not optional for serious BIM projects, it is the foundation that everyone works from.
Key sections a BEP must cover:
Project information and team contacts.
BIM goals and objectives — specific, measurable outcomes the project team is committing to achieve through BIM.
Software and version specifications — Revit version, Navisworks version, AutoCAD version if used, IFC standard if applicable.
File naming conventions and folder structure.
Model organisation — workset structure, linked file strategy, origin point definition.
LOD (Level of Development) requirements per project phase.
Coordination process — who runs clash detection, how often, how issues are tracked.
Deliverable schedule — what gets submitted, when, in what format.
Quality control process — who reviews models before submission.
In India, the BEP is increasingly required on government and institutional projects, and is standard practice at AECOM, L&T, and Shapoorji Pallonji. For senior roles, you should be able to describe contributing to or leading BEP development.
30. What are LOD 100 to LOD 500 levels and when is each used?
| LOD | Name | What it means | Typical stage |
| 100 | Conceptual | Overall massing, approximate geometry | Concept design |
| 200 | Schematic | Generic systems, approximate dimensions | Schematic design |
| 300 | Developed | Specific elements, accurate geometry, coordination-ready | Design development |
| 350 | Construction | Full coordination, interfaces defined | Construction documents |
| 400 | Fabrication | Shop drawing detail, manufacturer-specific | Fabrication |
| 500 | As-Built | Field-verified, actual installed conditions | Post-construction |
The important point for interviews: LOD is not just about geometric detail — it is about information reliability. LOD 200 means you can make schematic decisions from the model but cannot rely on it for cost estimation. LOD 300 means the information is reliable for design coordination. LOD 400 means someone is manufacturing based on this model.
Most Indian commercial project BIM contracts require LOD 300–350 for construction documentation delivery.
31. How do you create adaptive components and curtain wall panels?
Adaptive components are parametric families that flex to fit variable geometric conditions. Instead of fixed reference planes, they use adaptive points — points that you place in the model and the family's geometry snaps and responds to.
Creating one: New Family → Generic Model Adaptive template → place adaptive points → build geometry constrained to those points → add parameters → test by placing on a divided surface.
Common application: curtain wall panels with irregular geometry. A standard curtain wall in Revit uses uniform grid spacing. A facade with varied panel sizes, different mullion profiles at different locations, or panels that follow a curved surface requires adaptive components on a divided surface.
The Divided Surface tool (under massing) lets you subdivide a curved surface into a grid that adaptive components can populate. This is how parametric facades — like the kind seen on contemporary commercial buildings — are built in Revit.
32. How do you optimize a heavy Revit model for performance?
Heavy Revit models are a real problem on large projects. Here is what actually helps:
Purge unused elements — Manage tab → Purge Unused. Removes families, materials, and other content that is in the project file but not placed in the model. This can reduce file size significantly.
Audit the file — when opening the file, check Audit. This scans for and fixes corrupt data.
Manage worksets — close worksets you are not actively working on. Unloaded worksets do not occupy memory.
Use section boxes in 3D views — limits the geometry Revit has to process when navigating.
Avoid imported CAD files — imported DWG files embed all their layers and data in the Revit file permanently. Use linked CAD instead.
Simplify families — over-detailed furniture families with accurate stitching on upholstery are a common culprit. Use simplified families for design-stage work.
Limit view range extents — views that see through the entire building height process more data than views with tightly set view ranges.
33. Explain the concept of COBie and facility handover data in Revit
COBie — Construction Operations Building Information Exchange — is a structured format for delivering building data to facility managers at project handover. Rather than handing over a stack of manuals, the COBie spreadsheet contains every piece of maintainable asset information in a standardised format: equipment type, location, manufacturer, serial number, warranty expiry, maintenance schedule.
In Revit, COBie data is embedded in model elements as parameter values. A mechanical unit in the model carries its manufacturer, model number, and warranty information as parameters. At handover, this data is extracted into the COBie format for the facility management team.
Why it matters for interviews: facility management is where BIM's value over the full lifecycle of a building is most clearly demonstrated. The buildings being handed over today will be maintained for 30–50 years. Good COBie data at handover saves significant money in operations. Firms increasingly include COBie delivery as a contractual requirement.
34. How do you manage multi-discipline coordination in a large Revit project?
Multi-discipline coordination on a real project involves: defined model ownership, disciplined synchronisation, regular coordination reviews, and clear issue tracking.
Practical workflow:
Each discipline maintains their own Revit model — architecture, structure, MEP each separate.
Models are linked into a coordination model (often in Navisworks or BIM 360 Coordination).
Clash detection runs weekly minimum. Results are categorised: hard clashes (elements physically overlapping), soft clashes (clearance violations), workflow clashes (sequencing conflicts).
Coordination meetings review clashes, assign resolution ownership, set deadlines.
Issue tracking in BIM 360 or equivalent platform — every clash gets a status that is updated until resolved.
Resolved issues are verified by re-running the same clash test and confirming zero results.
The human side matters as much as the software side. MEP engineers and structural engineers have different priorities. Good coordination means building enough trust and communication that clashes get resolved collaboratively rather than each discipline defending their own model.
35. What are the new features introduced in Revit 2026?
The major updates in Revit 2026 worth mentioning in interviews:
Accelerated Graphics — GPU-accelerated navigation in views. Smoother 3D orbit, faster view activation, transparency support for highlighted elements. This has been requested by the industry for years.
Create Walls by Room — Select a room boundary to automatically generate walls along the perimeter. Significantly faster for interior fit-out documentation.
Toposolid improvements — Negative subdivision values for recessed elements like paths and roads. Sub-divisions now have independent visibility control and can be scheduled separately.
ReCap Pro Mesh plugin — Import large-scale reality capture mesh data (from laser scans) directly into Revit with manageable performance impact. Important for adaptive reuse and renovation projects.
Twinmotion Integration updates — Automatic asset substitution when exporting to Twinmotion, new export options, support for Twinmotion version selection.
Documentation enhancements — Save Position command for consistent view placement, Sheet Scale Override for mixed-scale sheets, View Reference instance-based labels.
Demonstrating awareness of Revit 2026 features immediately signals that you are genuinely engaged with the software and industry — not just someone who learned Revit a few years ago and has not kept up.
Revit MEP Interview Questions
Also read: BIM engineer interview questions
36. What are the key MEP systems you can model in Revit?
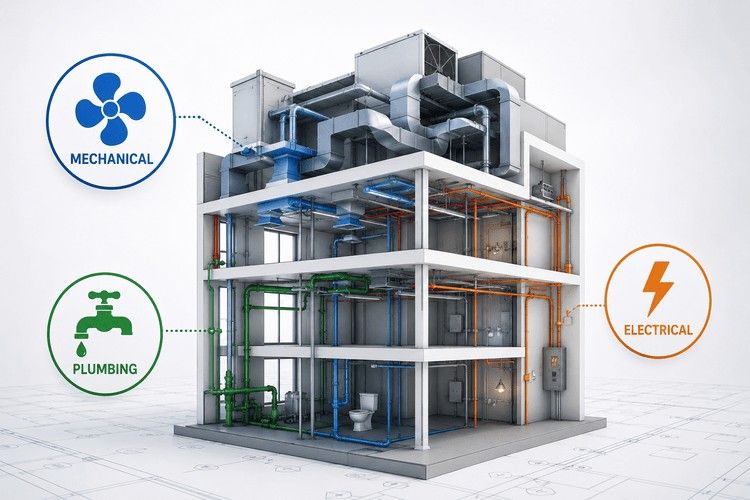
Revit MEP covers three primary engineering disciplines:
Mechanical — HVAC systems including supply air ductwork, return air ductwork, exhaust, fan coil units, air handling units, chillers, and cooling towers. Revit MEP can size ductwork automatically based on airflow calculations.
Electrical — Power distribution including panels, conduit, cable trays, switchgear, generators. Lighting systems with fixtures and switching. Low voltage systems including data, fire alarm, and security.
Plumbing — Domestic cold and hot water supply, sanitary drainage, stormwater, fire suppression sprinkler systems. Pipe sizing and slope calculations.
The integration between these systems and the architectural model is the value — when the architect changes the ceiling height, the MEP engineer's ductwork model shows the clash immediately rather than discovering the conflict on site.
37. How does duct routing work in Revit MEP?
Ducts are modelled using the Duct tool in the Systems tab. You select the system type (supply, return, exhaust), specify the duct size or let Revit calculate it based on airflow requirements, and draw the duct path.
Auto-routing: Revit MEP includes automatic duct routing that can generate duct paths between connected equipment based on defined routing preferences (height, offset from ceiling, duct type). This is a starting point — auto-routing produces a logical layout that you then refine.
Fittings — elbows, tees, transitions, reducers — are added automatically as you route. Fitting families need to be loaded for the duct shape (rectangular, round, oval) you are using.
The practical skill at interviews is understanding duct sizing logic — velocity and pressure-based sizing — and being able to troubleshoot routing conflicts where ducts need to share ceiling space with structural beams and piping.
38. What is a mechanical system and how do you create one?
A mechanical system in Revit MEP is a defined set of components that are logically connected for airflow, refrigerant, or hydronic circulation purposes.
Creating a system: select the air terminals or mechanical equipment → Systems tab → Create System → name the system → assign the type (supply air, return air, etc.).
Why systems matter: Revit uses system assignments for calculation, colour-coding, and coordination. Schedules can extract system-by-system airflow totals. Clash detection can be run by system type. Pressure drop calculations rely on accurate system connectivity.
In real projects, a large office building might have 15–20 separate air handling zones, each as a distinct mechanical system in the model. Keeping systems clearly named and organised is essential for both documentation and engineering analysis.
39. How do you handle pipe slopes in Revit MEP?
Drainage pipes must be sloped for gravity flow — this is a building code requirement and a practical installation necessity. Revit MEP handles this through the slope parameter on pipe elements.
Setting slope: when placing a pipe, define the slope value (e.g., 1% or 1:100 for sanitary drainage, 0.5% minimum per IS codes for certain applications). Revit adjusts the elevation of the pipe automatically along its run to achieve the defined slope.
The challenge in coordination: a sloped drain pipe that starts at ceiling level and drops across a 15-metre run ends up significantly lower than it started. If ductwork or structural beams are in that corridor, the slope creates clashes that were not visible in a simple horizontal routing check. This is one of the reasons early MEP coordination is so valuable.
40. What is space and zone modelling in Revit for energy analysis?
Spaces in Revit MEP are analytical volumes placed within rooms to define the thermal zones for energy analysis. Unlike rooms (which are architectural elements), spaces carry HVAC-specific parameters — occupancy, lighting load, equipment load, HVAC system assignment.
Zones are groups of spaces that share a single HVAC system or thermal control zone.
The energy analysis workflow: create spaces in the architectural model (or MEP model linked to architecture), assign HVAC zones, define loads, then export to energy analysis software or use Revit's built-in Insight integration for preliminary energy modelling.
In green building certification workflows for IGBC or GRIHA projects in India, the space and zone model is the input data for energy simulation. Getting the zone assignments and load parameters right in Revit directly affects the accuracy of the sustainability analysis.
Structural Revit Interview Questions
41. What is the difference between architectural and structural columns in Revit?
Architectural columns are primarily visual elements — they define the appearance of a column in architectural drawings without carrying structural data or connecting to structural analysis tools. They are placed using the Architecture tab.
Structural columns carry engineering data — material specifications, analytical model connections, load-bearing properties. They are placed using the Structure tab and connect to Revit's analytical model, which can be exported to structural analysis software.
In a coordinated BIM model, the structural engineer places structural columns in their model, and the architect links that model and places architectural columns (or cladding) referencing the structural grid. Copy/Monitor tracks the relationship — if the structural engineer adjusts a column location, the architect's model receives an alert.
42. How do you add rebar to structural elements in Revit?
Structure tab → Rebar. You can add individual rebar bars, rebar sets (evenly spaced bars), or rebar paths following element geometry.
For a concrete beam: select the beam, switch to a cross-section view, use Rebar to place longitudinal bars and stirrups at defined spacing. Rebar families need to be loaded with the correct bar diameters matching the project specification.
Rebar schedules extract directly from the model — bar mark, diameter, length, quantity, shape code. This is increasingly used by structural firms in India for shop drawing production, reducing the manual drafting time for reinforcement detailing.
43. What is an analytical model in Revit Structure?
The analytical model is a simplified representation of the structural system that drives structural analysis. Every structural element — column, beam, wall, foundation — has an analytical counterpart that defines centreline, support conditions, and connectivity.
The analytical model is what gets exported to structural analysis software (ETABS, STAAD, Robot Structural Analysis). The analysis software uses it to calculate loads, deflections, and moments.
Keeping the analytical model clean — correctly connected nodes, consistent support conditions, no floating analytical elements — is as important as the physical model when working on structural BIM projects.
44. How does Revit integrate with structural analysis software?
The primary integration path: Revit's analytical model exports via the Structural Analysis Link to software like ETABS, STAAD.Pro, and Autodesk Robot Structural Analysis.
The integration is bidirectional in some cases — design changes in the analysis software can be sent back to update the Revit model, maintaining consistency between the structural design and documentation model.
In practice, the coordination between Revit and analysis software requires careful mapping of section properties, material properties, and support conditions. Most structural firms in India maintain this as a defined workflow within their BIM Execution Plan.
45. What are foundations and how are they modelled in Revit?
Revit has three foundation types: Isolated Foundations (individual footings under columns), Wall Foundations (continuous strip footings under walls), and Structural Foundation Slabs (raft or mat foundations).
Foundation modelling: Structure tab → Foundation → select type → place under the relevant column or wall.
Foundation families carry structural parameters: bearing capacity assumptions, material specifications, dimensions. They appear in structural schedules and can be exported to structural analysis workflows.
In a complete building model, foundations sit below the lowest level. Getting the site survey data correct and the foundation level set accurately is critical, foundation clashes with utilities and other below-grade elements are among the most expensive site problems to fix.
Scenario-Based and HR Questions for BIM and Revit Roles
46. Tell me about a time you resolved a major clash in a BIM project
What interviewers want to hear: A specific example, not a general description of how clash detection works, but a real situation. They want to know: what the clash was, how you discovered it, what disciplines were involved, how you communicated it, what the resolution was, and what the outcome was.
Example answer structure: "On a 12-storey commercial project in Hyderabad, we discovered during our weekly Navisworks coordination that the main supply air riser from the ground floor plant room was routing directly through a primary structural transfer beam at Level 2. The duct was 1200 x 600mm and the conflict meant it could not be installed at the designed height. I documented the clash in the issue register with full visual documentation and brought it to the coordination meeting with the MEP and structural consultants. We resolved it by rerouting the duct 600mm west of its original path, which required re-coordination of adjacent drainage pipes but avoided any structural modifications. The resolution was confirmed in the next coordination round with zero recurrence."
47. How do you handle a situation where team members are not following BIM standards?
What interviewers want to hear: Problem-solving without blame. The answer should show you understand why standards drift (pressure, unfamiliarity, unclear documentation) and that you address it constructively.
Good answer: Clarify first whether the standard is documented and accessible — sometimes people are not following a standard because they do not know it exists or cannot find it. If the issue is awareness, a short team briefing or updated template usually resolves it. If it is intentional shortcuts, a direct conversation about why the standard exists and what problems it prevents is more effective than enforcement. For repeated or serious issues, escalate with documentation.
48. How do you stay updated with Revit and BIM industry developments?
Honest, specific answers work best here.
Autodesk's official release notes and What's New documentation for each Revit version. Revit-specific communities on LinkedIn and architecture/BIM groups where practitioners share real project experiences. Industry events and webinars — IGBC events, BIM conferences, Autodesk University (now Autodesk University Plus). Following BIM managers and BIM coordinators at Indian and international firms who share workflow insights publicly.
Learning new features by actually using them on live or practice projects — not just reading about them.
49. How would you explain BIM benefits to a client who has never used it?
Reduce explanation to real outcomes they care about: fewer surprises during construction (which means cost certainty), better visualisation of what they are getting (which means fewer changes after construction starts), and better data for managing the building after it is built (which means lower maintenance costs over the life of the building).
The three numbers that tend to land: BIM typically reduces construction RFIs by 40–60%, reduces coordination-related site rework by 30–50%, and produces as-built data that reduces facility management costs over the building's lifetime.
50. Where do you see BIM and Revit heading in the next 5 years?
What interviewers want to hear: Genuine engagement with the industry's direction, not a rehearsed answer.
The real trends: AI-assisted design generation integrated into BIM workflows. Digital twins — live, data-connected models that reflect real building performance. Generative design for structural and MEP optimisation. Deeper integration between BIM and construction site technology (point clouds from drones, AR overlays from tablets on site). India-specific: increasing government mandates for BIM on public infrastructure projects, which will accelerate adoption across the supply chain.
The honest observation: Revit itself will likely continue evolving, but the underlying principle — intelligent, data-rich models that serve the full building lifecycle — is not going anywhere. The professionals who understand that principle deeply will continue to be valuable regardless of which specific software they are using.
How to Prepare for a Revit Interview — 5-Day Study Plan
Three days before the interview is not enough. Ideally, you are building your Revit knowledge over weeks and months. But if you have five focused days, here is how to use them well.
Day 1 — Fundamentals. Revit concepts, families (all three types), levels and grids, view templates, and basic floor plan creation. Open Revit and spend two hours doing — not just reading. Create a small model from scratch.
Day 2 — Families and Worksharing. Family types in depth, when to use each. Worksharing setup — create a practice Central Model, make a Local Copy, and practice synchronisation. Workset creation and management.
Day 3 — Documentation and Sheets. Schedules (create a door schedule, a room schedule, a material takeoff). Sheet setup — place views, configure title block, add revision. View range, scope boxes, keynotes.
Day 4 — Advanced Topics and Dynamo. LOD levels, BIM Execution Plan components, clash detection workflow, COBie basics. If you have Dynamo installed, work through one simple automation script — batch renaming views is a good starting point.
Day 5 — Mock Interview and Portfolio Review. Ask a colleague, friend, or mentor to ask you ten random questions from this list. Record yourself answering. Watch it back and identify where you paused or where your answer was vague. Review your portfolio and identify which projects demonstrate the Revit skills you have been reviewing.
Also read: How to ace your BIM architect interview
Quick Reference — Revit Interview Cheat Sheet
| Topic | Most Likely Question |
| BIM Basics | What is Revit and how does it differ from AutoCAD? |
| Families | Explain System, Loadable, and In-Place families |
| Collaboration | How does worksharing and the central model work? |
| Documentation | How do you set up sheets for construction drawings? |
| Advanced | What is Dynamo and how have you used it? |
| MEP | How does duct routing work in Revit MEP? |
| Coordination | Describe a clash you resolved in a BIM project |
| 2026 Features | What is new in Revit 2026? |
Stand out in Revit interviews with industry-ready BIM expertise. Kaarwan's Revit & BIM Certification Course helps you master workflows, coordination, documentation, and project delivery through hands-on training and expert mentorship.
Closing
The BIM job market in India is not slowing down. Government infrastructure mandates, corporate real estate expansion, and international project work are all driving demand for architects and engineers who can work competently in Revit and BIM environments.
The questions in this guide cover what you will actually be asked, from the most basic to the most technical. If you worked through them and found gaps, those gaps are fixable. The technical knowledge behind every answer here is learnable with the right structured training and hands-on practice.
The Kaarwan BIM and Revit Certification Course is built specifically for this career path, covering every workflow area above with real project exercises and instructor feedback from people who have worked at the firms conducting these interviews.
The job market for BIM professionals in India is genuinely strong and getting stronger. The gap between supply and demand for people who actually know this field is real, and it is working in your favour. Go use it.
FAQ — Revit Interview Questions
What topics are covered in a Revit interview?
Most Revit interviews cover BIM fundamentals and what makes Revit different from CAD, families and parametric modelling, worksharing and collaboration workflows, documentation setup (schedules, sheets, views), and at least one scenario-based question about how you have handled a real challenge. Senior roles add Dynamo, LOD management, BEP development, and multi-discipline coordination.
Is a Revit interview difficult for freshers?
Fresher interviews focus on fundamentals rather than project experience, so they are very passable with solid preparation. The questions most freshers struggle with are the "why" questions: not just "what is a workset" but "why would you use worksets on a real project." If you understand the purpose behind each Revit feature, not just the mechanics, fresher interviews become manageable.
What is the salary of a Revit architect in India in 2026?
Based on data from AmbitionBox and Naukri Salary, freshers with 0–1 years of Revit experience typically earn Rs 3–5 LPA at architecture and engineering firms in India. With 2–4 years of experience and BIM certification, salaries typically reach Rs 6–10 LPA. Senior BIM coordinators and BIM managers with 7+ years earn Rs 12–20 LPA at large firms. BIM-certified architects consistently earn at the higher end of these ranges — the 40% premium for certification is well-documented in the Indian AEC market.
Do I need Autodesk certification to get a Revit job?
Not strictly required, but it meaningfully improves your chances and your salary. Autodesk's certification validates your skills independently — it tells a hiring manager that your Revit knowledge has been assessed against a standardised benchmark, not just self-reported. For competitive roles at firms like AECOM India or L&T Construction, certification is a significant differentiator when two otherwise similar candidates are being compared.
Also read: Revit certification levels
How many days does it take to prepare for a Revit interview?
Five focused days of revision is enough if you have existing Revit experience. If you are starting from scratch, plan for four to eight weeks of structured learning before you are interview-ready for an entry-level BIM role. The 5-day prep plan above assumes you already know the software and are reviewing and consolidating rather than learning from zero.
What is the difference between Revit and BIM?
BIM is the methodology, Building Information Modeling, the practice of creating and using intelligent, data-rich digital models throughout a building's lifecycle. Revit is one software tool used to implement BIM. You can practice BIM using Revit, ArchiCAD, Bentley AECOsim, or several other platforms. In India, Revit is the dominant BIM authoring tool, which is why "Revit skills" and "BIM skills" are often used interchangeably — but they are not the same thing. BIM knowledge includes process, coordination, and data management, not just software operation.
Which companies hire Revit professionals in India?
The major hirers of Revit professionals in India include L&T Construction, Shapoorji Pallonji, AECOM India, Colliers India, Nikken Sekkei India, Jacobs India, and WSP India at the MNC and large contractor level. Mid-size firms like Vir Mueller Architects, Morphogenesis, and CP Kukreja Architects actively hire BIM-proficient architects. Smaller architecture studios across Bengaluru, Mumbai, Delhi, Pune, and Hyderabad hire Revit-skilled freshers and junior architects for documentation and coordination roles. BIM-only service firms — Revit modelling and coordination outsourcing companies — are another significant employer category.