There's a very specific kind of panic that hits you the night before a jury review. Your model's done, your plans are printed, and then someone asks "so what does it actually look like?" And you realise your only answer is a flat SketchUp screenshot that looks like it's from 2009.
This is basically why Enscape exists.
If you've been anywhere near an architecture studio in the last few years, you've probably heard someone mention it - usually right after they've pulled up a live walkthrough of their model on their laptop, moving the camera around in real time while everyone else is still waiting for their V-Ray render to finish. That's the whole pitch. No waiting. You model, you hit start, and there's your building - lit, textured, and walkable.
This guide is for anyone who's never opened Enscape before and wants to actually understand it, not just fumble through a tutorial video at 1x speed. We'll go through installation for both SketchUp and Revit, the GPU stuff nobody explains properly, your first actual render, and the handful of errors that trip up literally everyone in their first week.
Also Read: Step-by-Step Workflow From SketchUp to Lumion Render
What Is Enscape and How Is It Different From V-Ray or D5 Render?
Enscape is a real-time rendering plugin - it sits inside your modeling software (SketchUp, Revit, Rhino, Archicad, or Vectorworks) rather than being a separate program you export files into. That's the core difference between it and something like V-Ray. V-Ray sends your model off to be calculated, frame by frame, and you wait. Enscape shows you the render as you're modeling. Move a wall, the render updates immediately. Change a material, same thing.
It's not doing anything magical - it's using your GPU to approximate lighting and shadows fast rather than calculating them with total precision. Which means the image quality has a ceiling that offline renderers like V-Ray don't have. But for architecture students, that trade-off almost always favours Enscape, because most of the value in student work comes from communicating a design clearly and quickly, not chasing photographic perfection.
If you're weighing SketchUp workflows more broadly against tools like this, it's worth reading why architecture students should master SketchUp and Lumion alongside this one - Enscape and Lumion solve a similar problem, just with different interfaces and pricing.
There's also a plugin called Twinmotion that follows a fairly similar real-time logic - another real-time plugin with a similar workflow, if you want to compare notes. And for anyone chasing maximum realism over speed, you'll eventually want to look at V-Ray if you want offline photorealism instead of real-time.
Also Read : Twinmotion for Revit Beginners
System Requirements: GPU and VRAM You'll Actually Need
Here's the part that trips up almost every student, so pay attention. Enscape leans entirely on your graphics card for rendering - not your CPU, not your RAM. If your laptop has integrated graphics (the kind built into the processor, common in most budget and mid-range laptops), Enscape either won't run at all or will run so poorly it's not worth the frustration.
The rough numbers, for SketchUp and Revit both:
- Minimum: A dedicated NVIDIA, AMD, or Intel Arc GPU with at least 4-6GB of dedicated VRAM
- Comfortable for daily use: 8GB VRAM or more, especially once your models get bigger or you start adding vegetation and people from the asset library
- Not shared memory - this is the bit people miss. Shared/integrated VRAM does not count the same way, and Enscape genuinely needs the dedicated kind
If you're not sure what card your laptop has, right-click your desktop, look for your graphics settings, or just search your laptop model - it's faster than digging through Device Manager. And keep your drivers updated. A surprising chunk of "Enscape won't start" complaints trace back to an outdated GPU driver, not the software itself.
Master architectural rendering with Kaarwan’s online course and turn your 3D designs into realistic, presentation-ready visualisations that impress clients.
Installing Enscape for SketchUp
Getting Enscape onto SketchUp is honestly the easy part. Once you've got your installer (sent via email after signing up for a trial, student license, or paid plan), close SketchUp first, then run the installer and follow the prompts.
Once it's done, open SketchUp back up. You'll find Enscape sitting under Extensions, or you can enable a dedicated Enscape toolbar by right-clicking your SketchUp toolbar area and selecting it from the list. That's it - SketchUp detects it automatically.
Installing Enscape for Revit
Revit's setup is nearly identical in spirit, with one small catch worth knowing early: Enscape doesn't work with Revit LT. If you're on the full version of Revit, close it, run the installer, and reopen. Enscape should now appear as a top-level menu item.
One thing worth flagging - there are known conflicts with two specific Revit plugins, Colorizer and Techviz. If you're running either, uninstall them first, or you'll likely run into stability issues down the line.
Your First Render: Materials, Lighting Sync, and Navigation
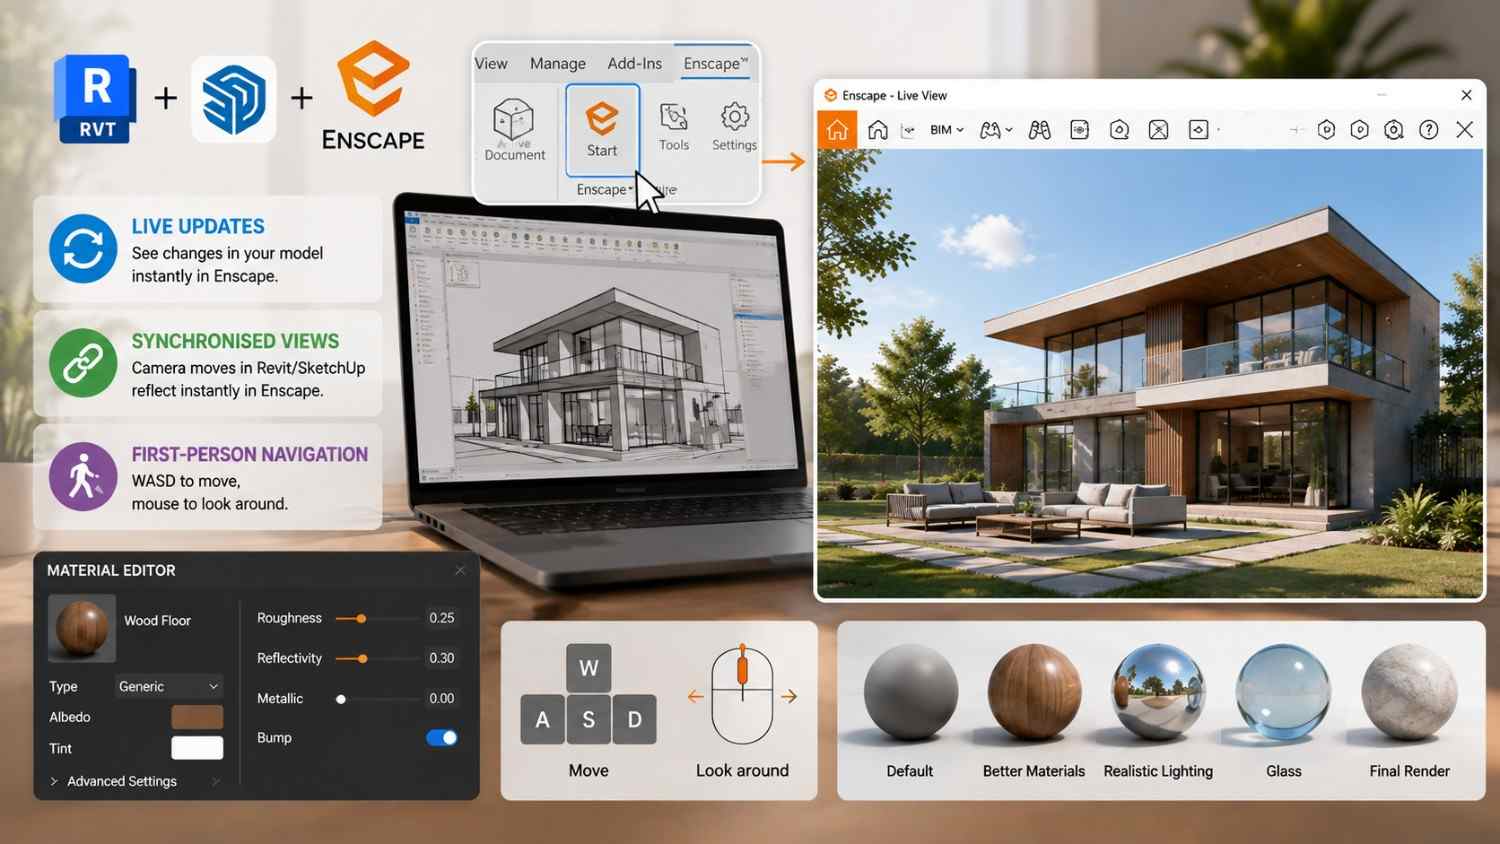
Once Enscape's installed, open a project file (a sample model works fine if you don't have your own yet), and hit the Start button on the Enscape toolbar. In Revit specifically, this button only becomes clickable once you've got a valid 3D view selected - a small detail that saves a lot of confused clicking.
Enscape opens in its own window with your model already rendered in perspective. From here, you can walk through it using standard first-person controls - WASD to move, mouse to look around. Turn on Live Updates and any change you make back in your modeling software - a new material, a moved wall - appears instantly in the Enscape window.
Turn on Synchronised Views and the two windows follow each other's camera position, which is genuinely useful when you're presenting and want to talk through the model from your modeling software's viewport instead of learning Enscape's navigation from scratch.
Materials are worth spending real time on early. Enscape has its own Material Editor that pulls in the same materials you've applied in SketchUp or Revit, but lets you adjust glossiness, bump maps, and reflections without leaving the plugin. This is where flat, grey student renders usually get fixed - not through better lighting alone, but through materials that actually behave like the real thing (a wood floor that catches a little glare, glass that actually reads as glass).
Common Enscape Errors and How to Fix Them
This is the section most Enscape guides skip, and it's honestly the most useful part for beginners.
Start button greyed out (mostly a Revit issue): You need at least one 3D view created and actively selected in your project. Enscape can't render a 2D plan or elevation view - it needs a proper 3D perspective to work from.
Enscape doesn't appear after installation: Try a clean reinstall - uninstall Enscape completely, restart your machine, then reinstall. This fixes the issue more often than people expect.
GPU not detected / performance is unusable: Almost always comes down to either integrated graphics with no dedicated GPU, or an outdated driver. Update your GPU driver directly from the NVIDIA or AMD site rather than relying on Windows Update.
Version mismatch errors: Usually happens when your host software (SketchUp or Revit) gets updated but your Enscape version hasn't caught up, or vice versa. Keeping both current avoids most of this.
Also Read: Why Architecture Students Should Master SketchUp and Lumion
Enscape VR: Walking Through Your Model
If you've got a VR headset compatible with your setup, Enscape lets you drop straight into your model and walk around it in first person - genuinely useful for spatial checks that are hard to catch on a flat screen, like whether a corridor actually feels too narrow.
Even without a headset, you can export a web standalone file that lets anyone open your project in a browser and explore it themselves, no Enscape license needed on their end. For juries or clients who can't install anything, this is a quietly excellent feature.
Build job-ready architecture visualisation and rendering skills with Kaarwan’s online course. Master real-time rendering workflows and create stunning visuals for your architecture career with confidence. Explore Kaarwan’s Online Architecture Visualisation & Rendering Course
Is Enscape Free for Students?
Short answer: no, but close enough that it barely matters. Enscape doesn't have a permanent free tier for anyone. What it does have is a 14-day full-feature trial (renders come with a watermark), and a heavily discounted education license for students enrolled at a degree-granting institution.
The education license gets you the complete toolkit - not a stripped-down version - for a small fraction of the commercial price, which currently sits well above ₹40,000 a year for individual professional plans.
FAQs
Why is the Enscape Start button greyed out in Revit?
You need an active, valid 3D view selected in your Revit project. Enscape can't launch from a 2D view.
Does Enscape work with integrated graphics (no dedicated GPU)?
Not reliably. Enscape depends on dedicated GPU VRAM, and integrated graphics typically can't meet even the minimum requirement.
Can I use Enscape and V-Ray on the same project?
Yes, they can coexist in the same SketchUp or Revit file without conflict, since they're separate rendering engines running independently.
Is there a free trial for Enscape?
Yes, a 14-day trial with full features, though exported images and videos carry a watermark until you purchase a license.