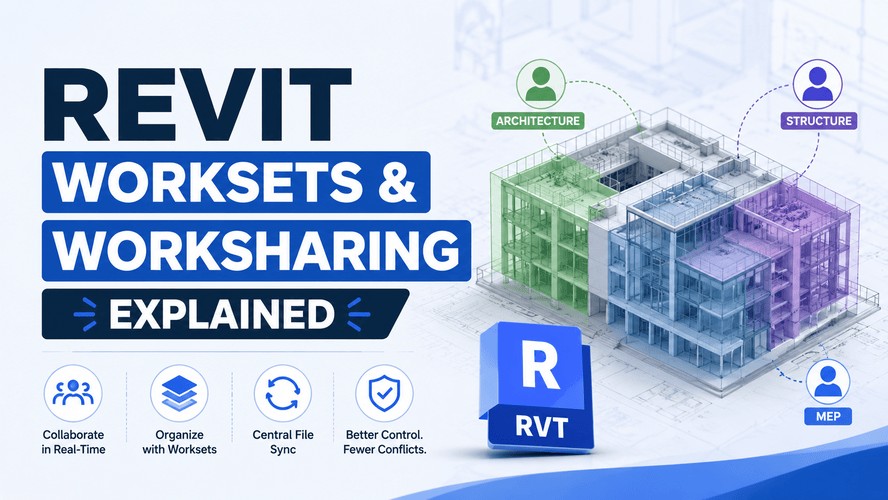
Here's a scenario that plays out in almost every BIM office at some point: someone opens a shared model, makes a few "harmless" edits, hits save, and by lunchtime three teammates are messaging asking why they can't touch the wall they were working on yesterday. Nobody broke anything, technically. They just didn't understand how Revit worksharing actually works.
If you're moving from solo practice files into a real team project, this is the thing that trips people up first - not the modelling, not the families, but the invisible rules around who owns what and when. So let's actually walk through it, properly, without the jargon-soup most tutorials drown you in.
And a quick note before we start: this isn't just exam-syllabus trivia. Understanding worksharing questions come up often in BIM interviews, and knowing the mechanics cold is often what separates a confident answer from a guessed one. It's also worth pairing with broader collaboration best practices beyond worksharing itself once you've got the basics down - that guide covers the human side of teamwork; this one's about the mechanics.
Also Read: Master the BIM Workflow Process - Ultimate Guide 2026
What Is Worksharing, and When Do You Actually Need It?
Worksharing is the umbrella term for Revit's whole multi-user setup. It's the system that lets several people open, edit, and save the same project model at more or less the same time, without everyone overwriting each other's work every five minutes.
Under the hood, it does two jobs. First, it splits the model logically so people can work on separate parts without stepping on each other. Second - and this is the part beginners underestimate - it tracks ownership. Every element in the model has, at any given moment, either nobody claiming it or exactly one person claiming it. That claim is what stops two people from editing the same wall at the same time and one of those edits silently vanishing.
Do you need it for every project? No. If you're modelling solo - a small residential job, a student portfolio piece, a concept you're iterating on alone - worksharing adds overhead you don't need yet. It's built for the moment more than one person needs to be inside the same file. The second a second person joins, though, turn it on before anyone starts modelling seriously. Retrofitting it onto a half-built model is doable but genuinely annoying.
Also Read: Improving Revit Workflows: Collaboration Tools Guide
Central Model vs Local File: What's the Difference?
This is the single most important distinction in the whole system, so let's get it straight early.
The central model is the master copy. It lives somewhere shared - a network drive if your office is doing things the old way, or more commonly now, on Autodesk Construction Cloud (ACC). It holds the single source of truth: every element, every workset, every bit of ownership information for the whole team.
Your local file is your personal working copy, saved on your own machine. You never touch the central model directly. Instead, you open a local copy, do your modelling there, and periodically push your changes up while pulling everyone else's changes down. That push-and-pull is called synchronizing - we'll get into it properly in a second.
Think of it like a shared document that nobody's allowed to type into directly. You're always working on a personal draft, and there's a formal moment where your draft gets merged in. It sounds like extra steps, and it is, but that layer of separation is exactly what keeps six people from turning a model into scrambled eggs.
Worksets and worksharing are exactly the kind of thing that's hard to learn from a blog alone - Kaarwan's Revit and BIM course puts you inside real collaborative projects with mentor support built in.
Enabling Worksharing and Creating Worksets
Turning worksharing on happens through Collaborate tab > Collaborate. The moment you do this, Revit automatically creates two default worksets for you: Shared Levels and Grids and a generically named Workset1.
Leave the first one alone - it's doing its job, holding your levels, grids, reference planes, and scope boxes so they don't clutter up every linked view for consultants. But rename Workset1 immediately, or repurpose it, because "Workset1" tells nobody anything six months in, and by then people are already modelling into it by default out of habit.
From there, build your actual workset list before major modelling begins. A workset is just a named group of elements - usually organised by physical zone or building system, not by person. Something like:
- Shell / Envelope
- Interiors
- Site
- Furniture
- Structural Links
- MEP Links
That last two are worth calling out - if a structural or MEP consultant's model is coming in as a linked file, give it its own dedicated workset. It makes turning visibility on and off for coordination dramatically easier down the line, and it's one of the smaller habits that pays off disproportionately later.
One thing worth flagging clearly: worksets aren't layers, even though they can feel like it at first glance. Their real job is managing who can edit what. Using them purely for visibility control, ignoring the ownership side entirely, is a habit that comes back to bite people once a project gets busy.
Also Read: Revit Certification Levels: ACU, ACP & Expert Guide
How to Create and Manage a Local File
Once worksharing's enabled and worksets exist, everyone on the team needs their own local file. This is done via File > Save As, choosing a local path on your own machine, and giving it a name that clearly marks it as a personal copy - a lot of studios use a naming convention like ProjectName_YourInitials.
The first time you open your local file, Revit quietly creates a user workset behind the scenes to hold your in-progress edits before they're synced. You don't need to manage this manually, it just exists - so don't be alarmed when you spot it in the worksets dialog and wonder where it came from.
A decent daily habit looks something like: open your local file with only the worksets you actually need visible (this alone can save real memory on a large model), work in reasonably short bursts rather than one marathon session, and don't let the file sit open and disconnected overnight. A local file that's gone stale for a day or two makes syncing messier than it needs to be.
Also Read: Essential Revit Plugins for Architecture Students
Synchronize With Central: What It Does and How Often to Use It
Synchronizing is the moment your local changes get pushed to the central model, and everyone else's changes get pulled down into your local file. Skip this step for too long, and you're basically working in an increasingly isolated bubble while your teammates' model drifts further from yours.
How often should you actually do it? Somewhere around every 30 to 45 minutes is the number most experienced BIM managers land on, or immediately after finishing any meaningful change - not just once at the end of the day. Waiting until 5pm, when four other people are also hitting sync at the same moment, is exactly how you end up with a ten-minute standoff nobody enjoys.
There's a checkbox in the sync dialog worth actually paying attention to - "relinquish all mine." Leaving it unchecked out of habit is a quiet but genuinely common cause of "why can't I edit this" tickets, because it means you're still technically holding onto elements you're not actively using. Tick it, unless you have a specific reason not to.
Element Borrowing and Editing Requests
Here's the mechanic that confuses almost everyone the first time it happens. You go to edit a wall, and Revit tells you it's owned by someone else. What actually happened is you're trying to "borrow" an element that's currently claimed.
Most teams don't formally take ownership of an entire workset - they borrow individual elements as they touch them, and those elements return to the shared pool once synced. If someone else already has the element you need, you can send an editing request. It shows up in their editing requests dialog, they choose to grant or deny it, and once granted, you reload the latest model to actually get access.
It's a genuinely small workplace skill that matters more than it looks - being reasonably prompt about granting requests, and not sitting on borrowed elements you're done with, is the kind of quiet professionalism that gets noticed on a real team. Worksharing Display mode (colour-by-owner) is a handy way to actually see who's holding what across the model if things ever feel murky.
Also Read: Revit Interview Questions and Answers 2026
Common Worksharing Mistakes Beginners Make
A few patterns show up again and again on shared projects, and almost all of them are avoidable once you know they exist:
- Editing the central file directly instead of a local copy - the one rule that should never get broken.
- Never synchronizing, then losing hours of work or creating painful merge conflicts when you finally do.
- One workset per person, which feels intuitive on day one and turns into a mess of orphaned worksets named after people who left the project months ago.
- Closing worksets to speed things up without realising it makes those elements genuinely invisible to teammates, who then draw services straight through walls they can't see.
- Dumping everything into whatever workset is active, rather than assigning elements deliberately from the start.
None of these are complicated to fix once someone points them out. They're just the sort of thing you only learn by breaking a model once - or, ideally, by reading about it before you do.
If you want the fuller picture of how this fits into a proper production pipeline, it's worth reading through Kaarwan's guide on BIM workflow, and if you're still building your foundational Revit toolkit, the essential Revit plugins roundup pairs well with this - several of those tools directly touch collaboration and version control. For anyone eyeing certification down the line, it's also worth knowing where worksets and worksharing sit within Autodesk's exam structure.
Want to actually practise this instead of just reading about it? Kaarwan's Advance Revit & BIM Certification Course walks you through live worksharing setups, permission structures, and real team-based project delivery.
FAQs
Can I edit the central model directly?
No - you always work from your local file and push changes through Synchronize with Central. Editing the central model directly risks corrupting it for the entire team, which is exactly the fear this whole system exists to prevent.
How often should I synchronize with central?
Every 30 to 45 minutes is a healthy rhythm, or immediately after finishing any significant change. Frequent, smaller syncs are far less painful than one big sync at the end of the day when everyone else is doing the same thing.
What happens if I delete a workset by accident?
You can't delete a workset that still has elements in it without reassigning them first - Revit will prompt you. If elements do go missing, checking the model's backup files or asking a teammate to sync their local copy is usually the fastest recovery route.
Do I need worksharing for a solo project?
Not really. Worksharing is built for the moment more than one person needs inside the same file. For a solo project, it's extra overhead with no real payoff - though it's still worth understanding conceptually before you join a team environment.